Connections
Conscia's DXO allows you to connect to any webservice endpoint - including CMSes, digital media platforms and product information management (PIM) systems, commerce engines, custom microservices, and more.
You can define a list of connections for each DXO application. A Connection is configured with information about the API endpoint to connect to including credentials, API tokens, webservice path, headers, query parameters, etc.
Conscia offers a library of pre-defined (out-of-the-box) Connection types to various popular backend applications for convenience. However, you can easily connect to any backend API using the 'Universal API Connector'.
Connection Types
The DXO platform offers two ways to create a Connection. When you want to offer an intuitive user interface to product and marketing teams to define the experience that sources content and product information from a CMS, Commerce Engine, etc, it is best to create a Vendor-specific Connection. An example would be if you want the business user to manually select a set of content items from a specific content type within Contentful.
On the other hand, if you only need to connect to a webservice API endpoint to retrieve data that doesn't require a business user interface to view/discover/select, you can use a Universal API Connector.
Here is a list of examples where you don't need a vendor specific Connection:
- Fetch customer's profile and set their customer segment as a real-time context.
- Add or Remove and item to/from Cart
- Retrieve prices from a pricing engine
In these examples, there is no need for non-technical users to provide their input in the API orchestration.
Create a New Connection
New connections can be created using any of the existing out-of-the-box Conscia Connection types. Although each connection requires a slightly different setup, all connections are share common elements such as:
- Connection Code
- Name
- Connector Type, and
- Connection setup details (i.e. tokens, API keys, environments, etc.)
To create a connection:
- Navigate to the Settings > Connections dashboard
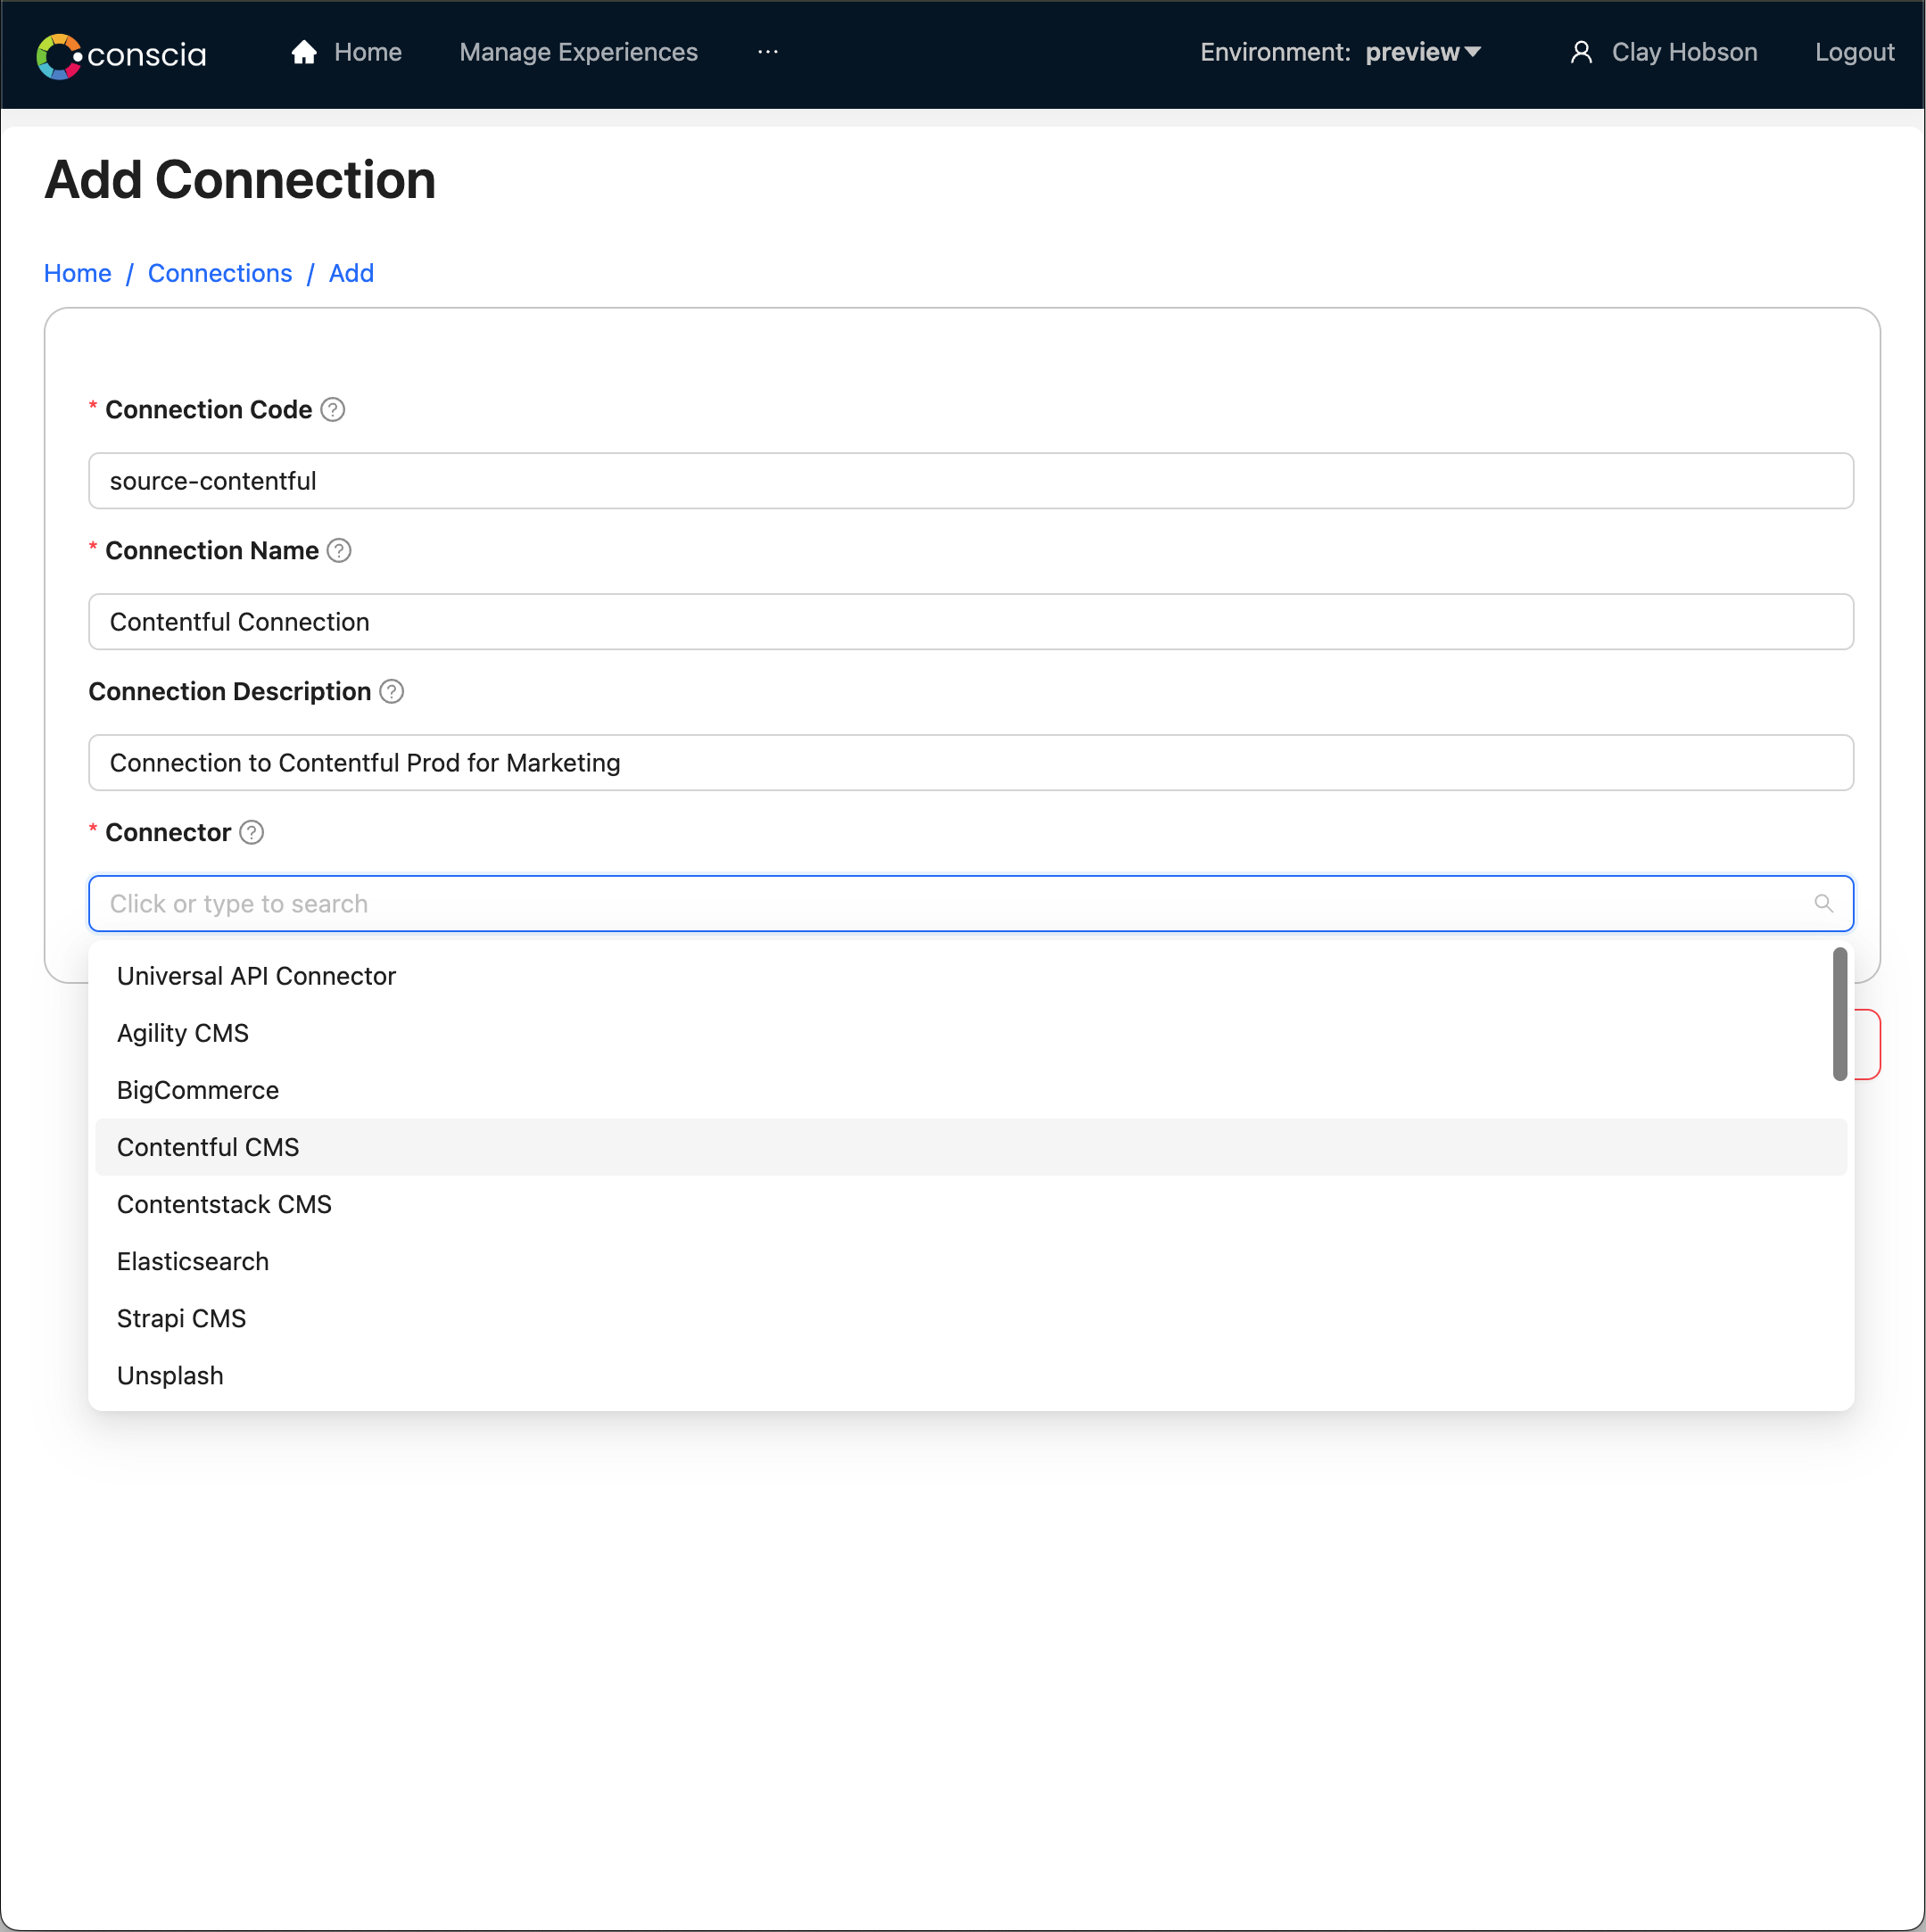
- In the action ribbon, select the "+" button to create a new connection
- In the new modal, give your new connection:
- Connection Code: This is a unique name for the connection
- Connection Name: A friendly name for the connection
- Connection Description: A description of what the connection does
- For the Connector, begin typing and select from one of the available connectors.
- Hit Submit to save the Connection.

Configuring a Vendor-Specific Connection
Once the connection is created, you are ready to define its settings. The list of fields to input for each connection will vary based on the system the connection is for. In the majority of cases, an endpoint and login credentials will be part of the connection configuration.
To Configure the Connection:
- Select the connection from the list.
- Right click on the DX Component and select "Update".
- In the Connection Setup section, enter the required information.
- Hit submit to save the Connection

Configuring the Universal API Connector
The Quick Start Guide provides the steps to define a connection to a backend system using the Universal API Connection here:
Using Connections in Orchestration Components
Now that a connection has been successfully created, Orchestration Components can leverage this established link to seamlessly update or retrieve content and data from the source systems.
Please note the following:
- Orchestration Components and Connections go hand in hand i.e vendor specific components require a vendor specific Connection to be created.
- A Universal DX Component requires a Universal API Connection to be created. All Vendor Specific Components (typically a Static and Dynamic Record List) have a corresponding Connection Type.
- Multiple Orchestration Components can refer to the same DX Connection. For instance, an AddToCart Component would use the same connection as CreateCart or UpdateCart if they're all communicating with a Commercetools backend.
- Some of the parameters available at the DX Connection level are also available in the DX Component. When the DX Engine executes the Component, it overrides any parameters in the DX Connection with the ones configured in the DX Component, if they were not configured in the DX Connection. If they were configured, the two will be merged.
For instance, the base url in the DX Connection may be set to something like https://useast.api.elasticpath.com and the Path parameter in the Component is set to /v2/carts/${contextField('cartId')}/checkout. The result will be the merging of these two pieces as: https://useast.api.elasticpath.com/v2/carts/${contextField('cartId')}/checkout when the DX Engine executes the DX Component.