Structure Data with Schema Management
Viewing The Schema Of An Existing Data Collection
Each collection within Conscia has an associated “schema” that essentially defines its data model. The schema controls what information is presented to business users in the grid view as well as the record form. Power users can view the schema associated with each collection in the DX Graph UI:
- From the top navigation, select SETTINGS > DATA MODEL. This will bring up a list of data collections.
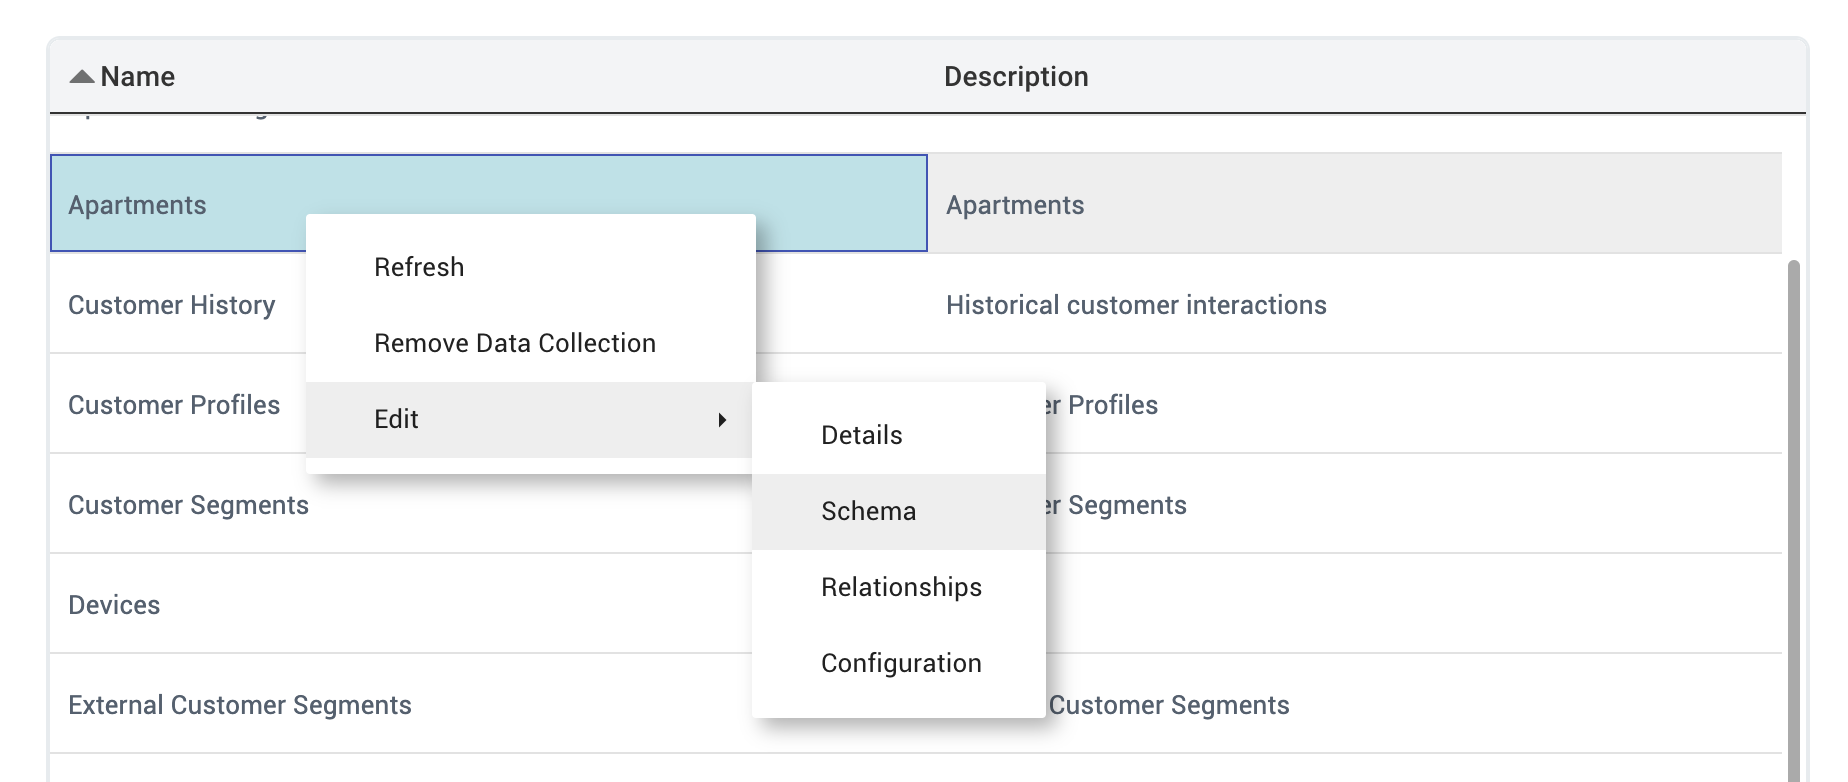
- Select the target collection by right clicking the record
- In the inline menu, select EDIT > SCHEMA. This will bring up the collections schema which is illustrated as a series of field
- Click on any of the fields to view the properties of the selected field. This is shown in the right most panel of the modal.
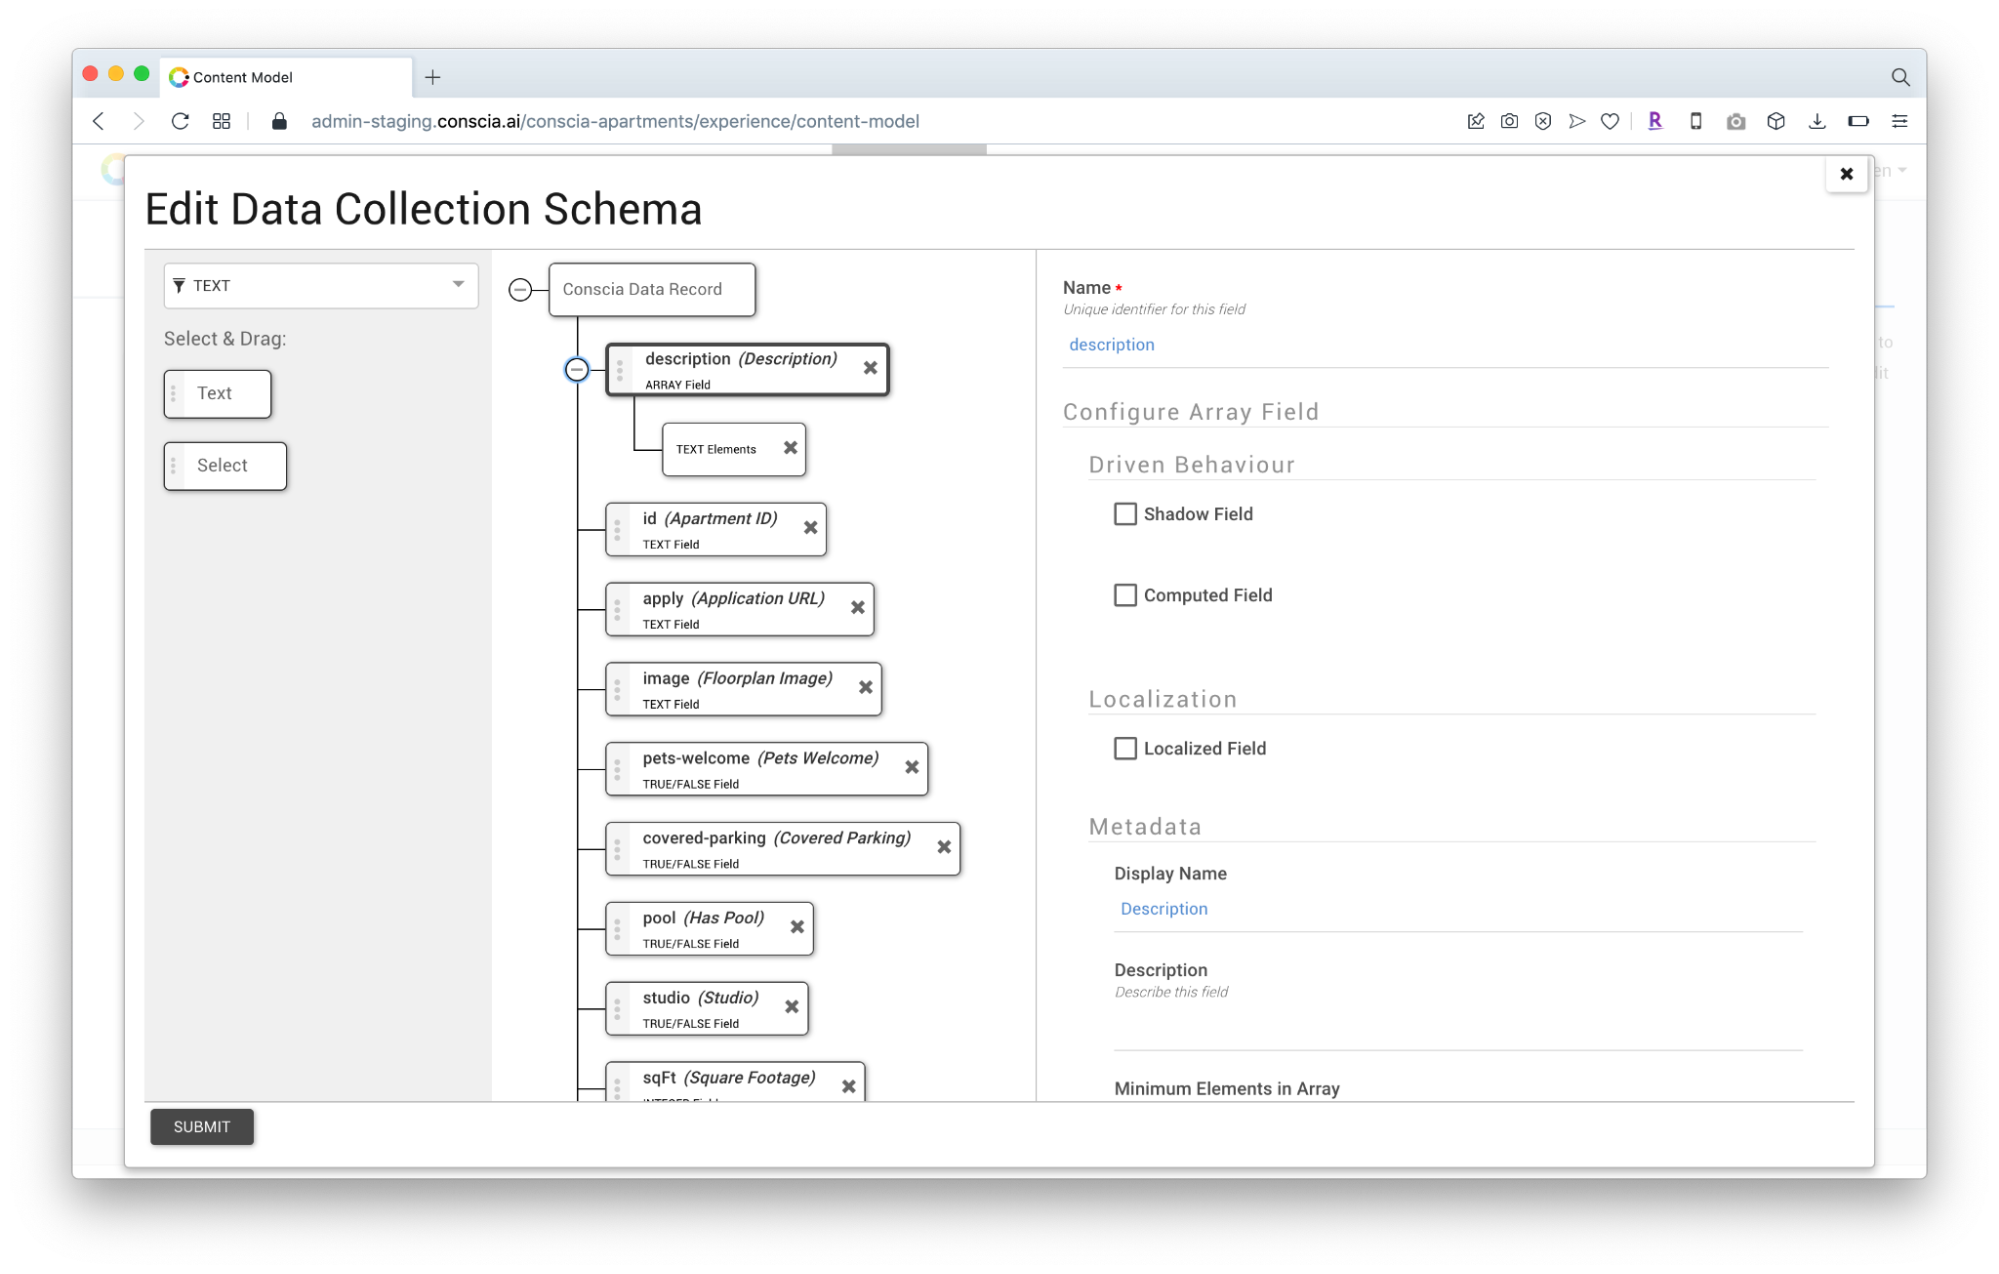
Note that some fields may be nested. These will appear as a “+”. Clicking on the “+” to expand the field.
Shadow Fields
Shadow fields are a powerful tool in Conscia that allows digital teams to create views of data that address the needs of downstream channels. Shadow fields can be created and configured within the Schema Editor and use expressions to map one or more source fields to a target field. You can think of shadow fields as a form of a calculated field. We’ll look at two examples on how to use shadow fields.
The Use of Expressions
The Reference Application, Conscia Homes, uses SQL-like syntax to define Shadow Field expressions. In the latest version of the Conscia Graph, this has been updated to JSONata (https://jsonata.org/). JSONata supports:
- A lightweight query and transformation language for JSON data
- Inspired by the location path semantics of XPath 3.1
- Sophisticated query expressions with minimal syntax
- Built in operators and functions for manipulating and combining data
- Creating user-defined functions
- Format query results into any JSON output structure
Example 1: Renaming a field
Let’s say that you have synced some blog content from Acquia. The naming convention in Acquia does not map well to the data model expected by the front-end application. There is a field called ‘name’ in Acquia that is expected to be called ‘name_en’ by the front-end application.
In order to map 'name' in the source to'name_en' in the view, we’ll create a new shadow field (called name_en) that will get its value from the existing field.
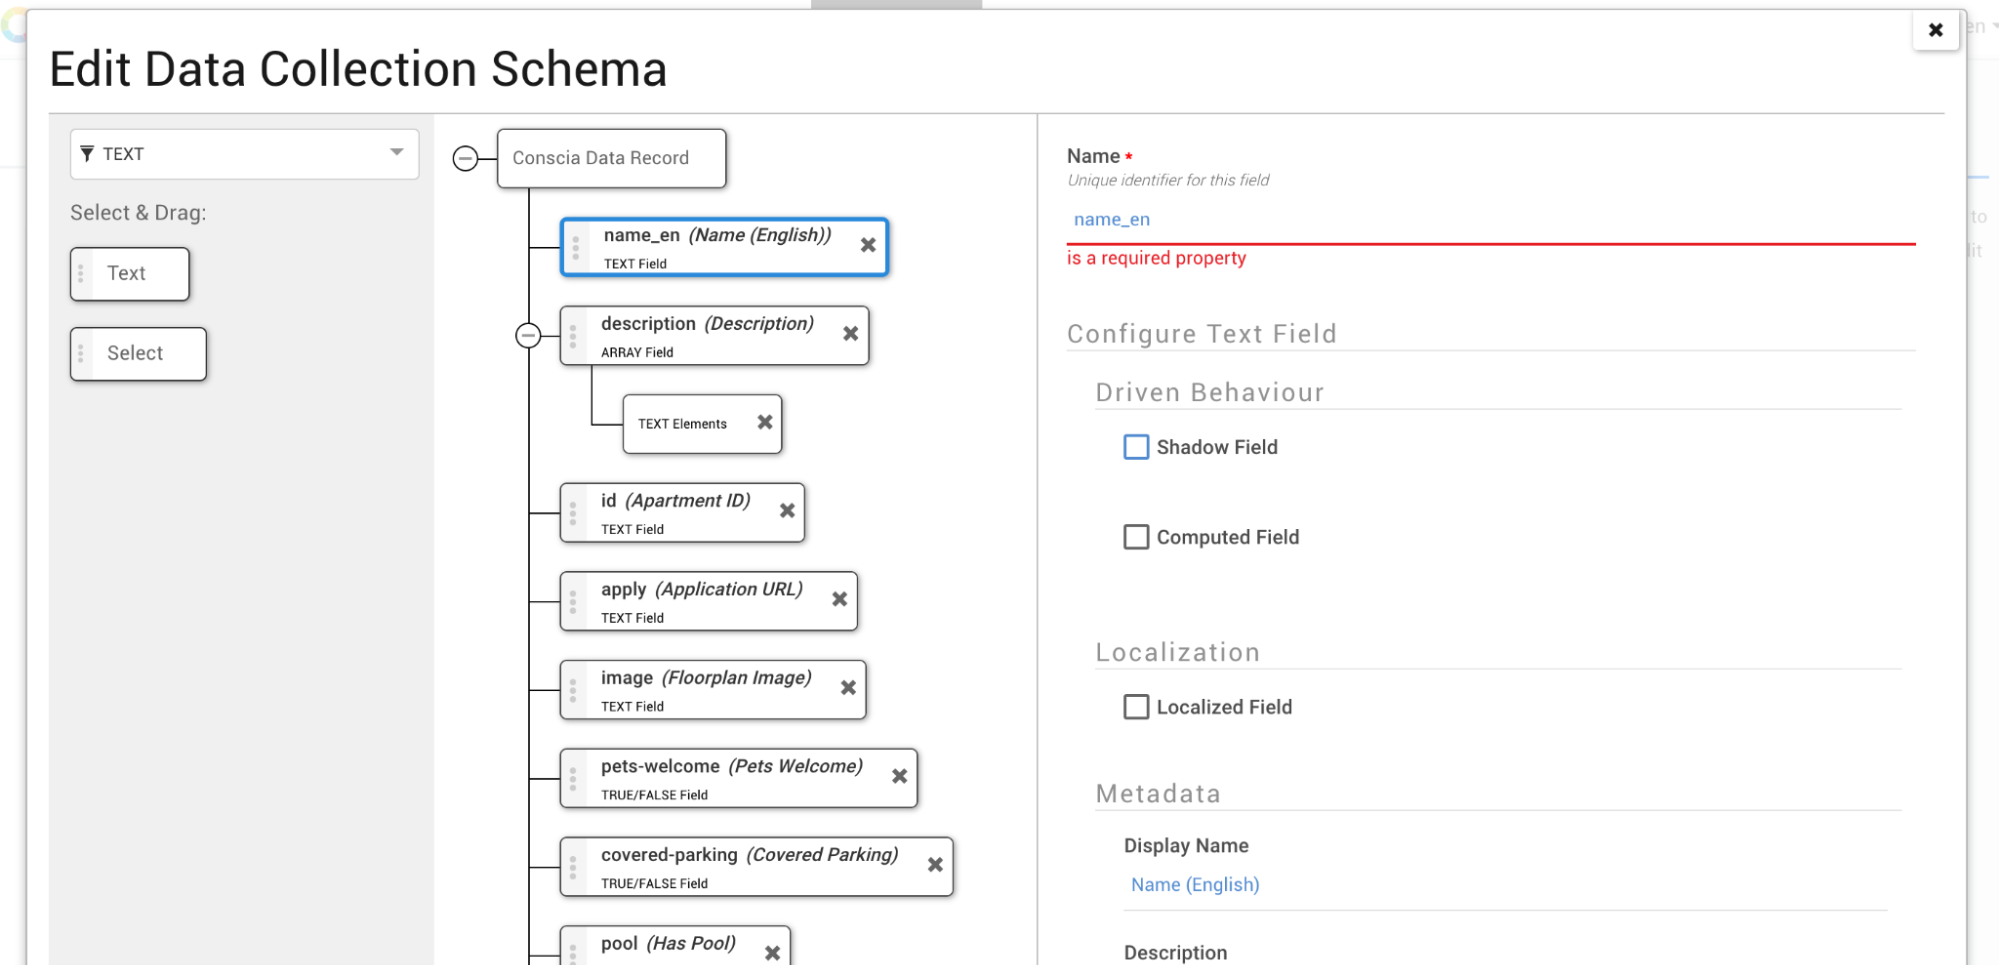
- In the schema builder, drag a new text field onto the schema.
- Click on the new field to bring up the field properties
- Add or set the following properties:
- Under the “NAME” field, enter “name_en”
- Under the “DISPLAY NAME” field, enter “Name (English)”. This is the user-friendly name that will appear as the column header in the grid view and the record forms.
- Select the “SHADOW FIELD” checkbox.
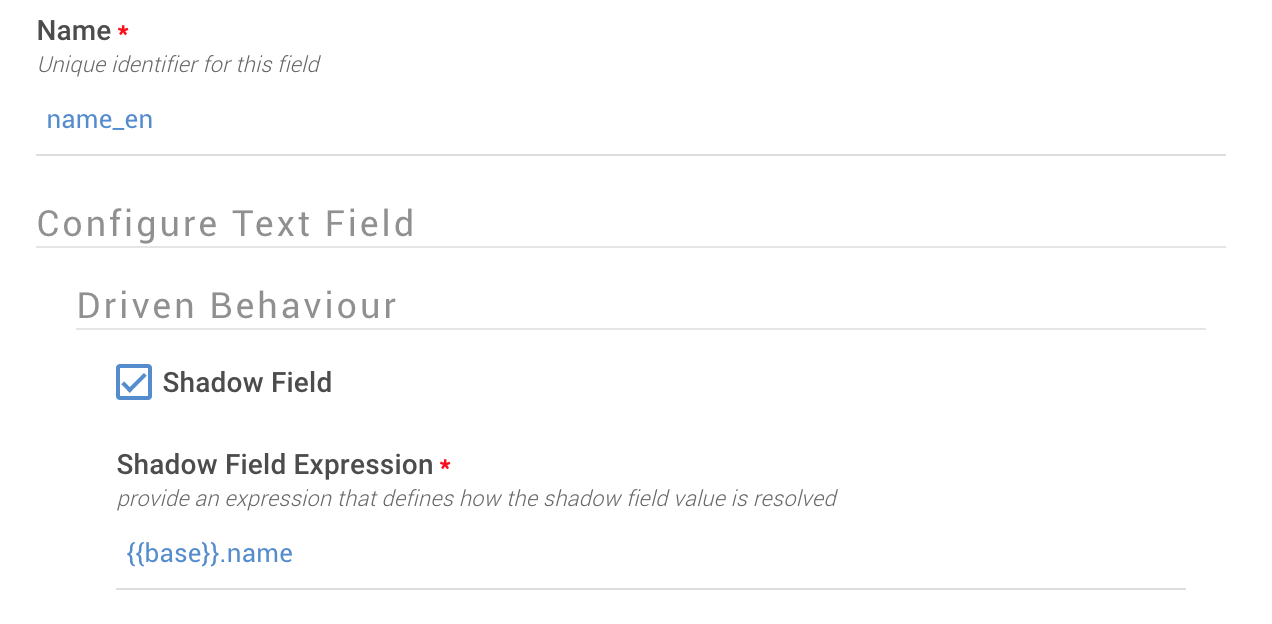
- In the newly exposed “Shadow field expression” field, enter {{base}}.name
- Save the schema by hitting “SUBMIT”
{{base}} is a reference to the source record and provides a handle to the fields within the record. So, setting an expression of {{base}}.name will populate the name_en field with the value of name.
Example 2: Creating an Override Field
In this example, we’ll assume two fields exist: name and name_override. The goal of this example is to pass the correct value to a downstream system (depending on whether an override name is defined). This is useful when giving the product teams some control over what appears in the downstream application without changing the source data.
- Create a new shadow field called “name_final”
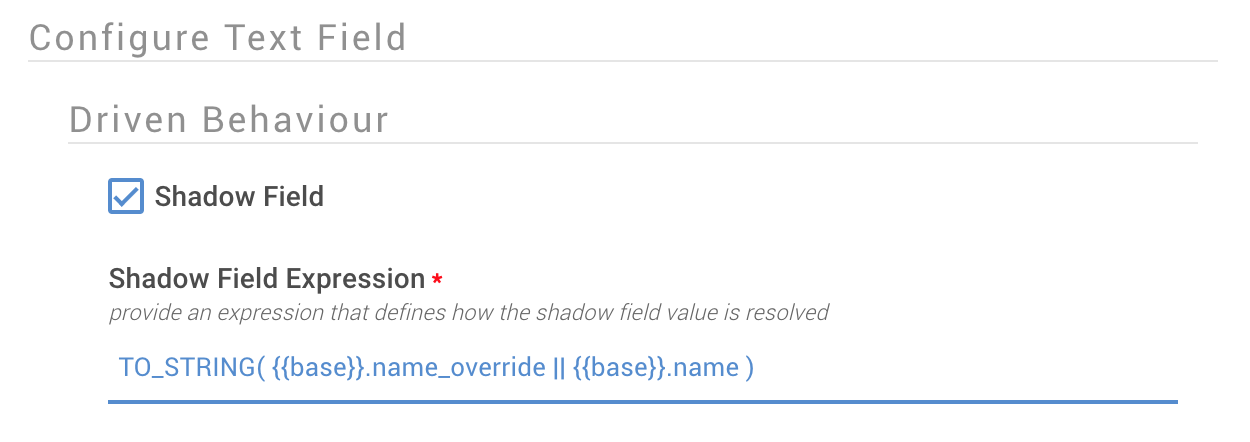
- In the shadow field expression, enter the following:
TO_STRING( {{base}}.name_override || {{base}}.name )
- Save the schema by hitting “SUBMIT”
The above expression looks at both the name and name_override field. If the name override field has a value, the shadow field will get this value. If name_override is blank, it will default to getting the value from name (the “||” serves as an OR operator). The end result is name_final is populated with the override if one exists.
More Examples
The shadow fields can evaluate complex expressions and provide a lot of control over the data model that is published to downstream systems. Here are some other use cases that we won’t detail out in this document:
- If a field value needs to be sourced from more than one source collection, you can specify a cascading priority such that the most relevant value is used.
- Stitch multiple fields within one or more collections to create a target field
- Take top level fields and turn them into a nested object or an array
- Take a nested source field and pull out specific values into a top level field
- Use conditional logic to transform field values from source to target
- Anything else you can imagine!
Making Fields Read Only
In certain scenarios, you may find it necessary to restrict specific fields within a collection's data model. This can be achieved through setting fields as read-only, ensuring data integrity and preventing unintended alterations.
- In the top navigation, select SETTINGS > DATA MODEL
- Navigate to the collection of interest and right click it to bring up the secondary menu
- Select EDIT > EDIT SCHEMA
- In the schema editor window, select the field you wish you edit. Doing so will bring up the fields properties in the right hand panel.
- Scroll down to the "Settings" section, and click "Read-Only".
- Repeat the same process for other fields as needed
- Click submit to save the schema changes.

When viewing the collection in a data grid, any field designated as read-only will appear with a lock icon in the field header. By utilizing this feature, you can confidently manage sensitive data and ensure that essential fields remain secure and unaltered.