One Time Application Setup
The goal of this guide is to familiarize yourself with DX Engine's UI. Please note that every capability exposed in the DX Engine UI is also available via API.
Pre-requisites:
- You have created a Conscia account and have received an email confirming that you have been granted access to a sandbox environment.
- You have received your API token to start building your front-end against the Experience APIs.
Accessing the DX Engine UI
To access the DX Engine UI, simply navigate to the following URL:
Take note that your "sandbox customer code" is the name immediately following the base URL. For example:
https://admin-staging.conscia.ai/[sandbox customer code]/experience/channels
Getting Acquainted with DX Engine
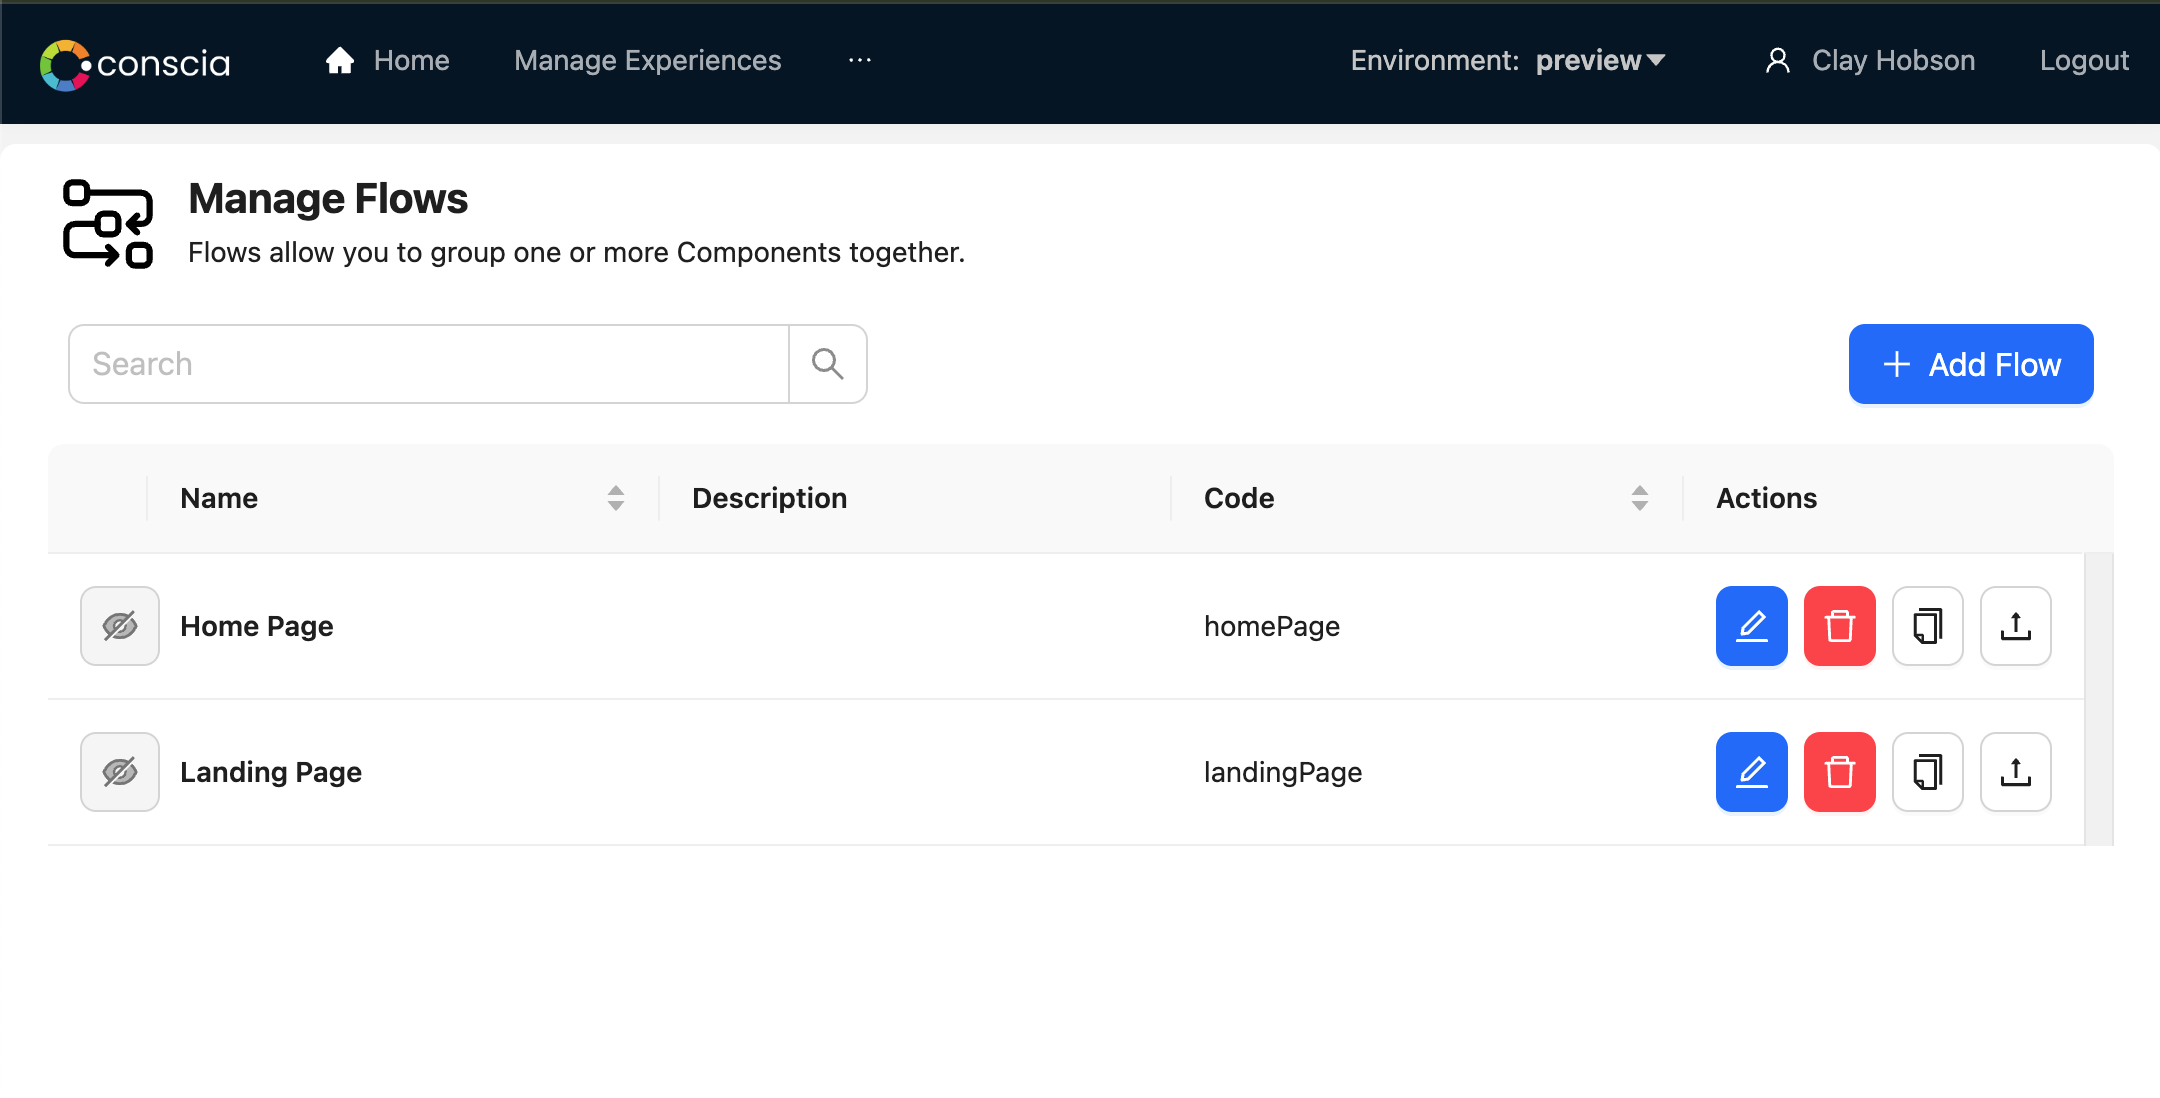
This guide provides several examples of application configurations to help get you familiar with the Conscia platform. Keep in mind that while your sandbox environment may have different Channels, Data Templates, Components and connections, the steps to create and configure each of them remains the same.
When you first log into the DX Engine UI, you'll be presented with the following home dashboard:
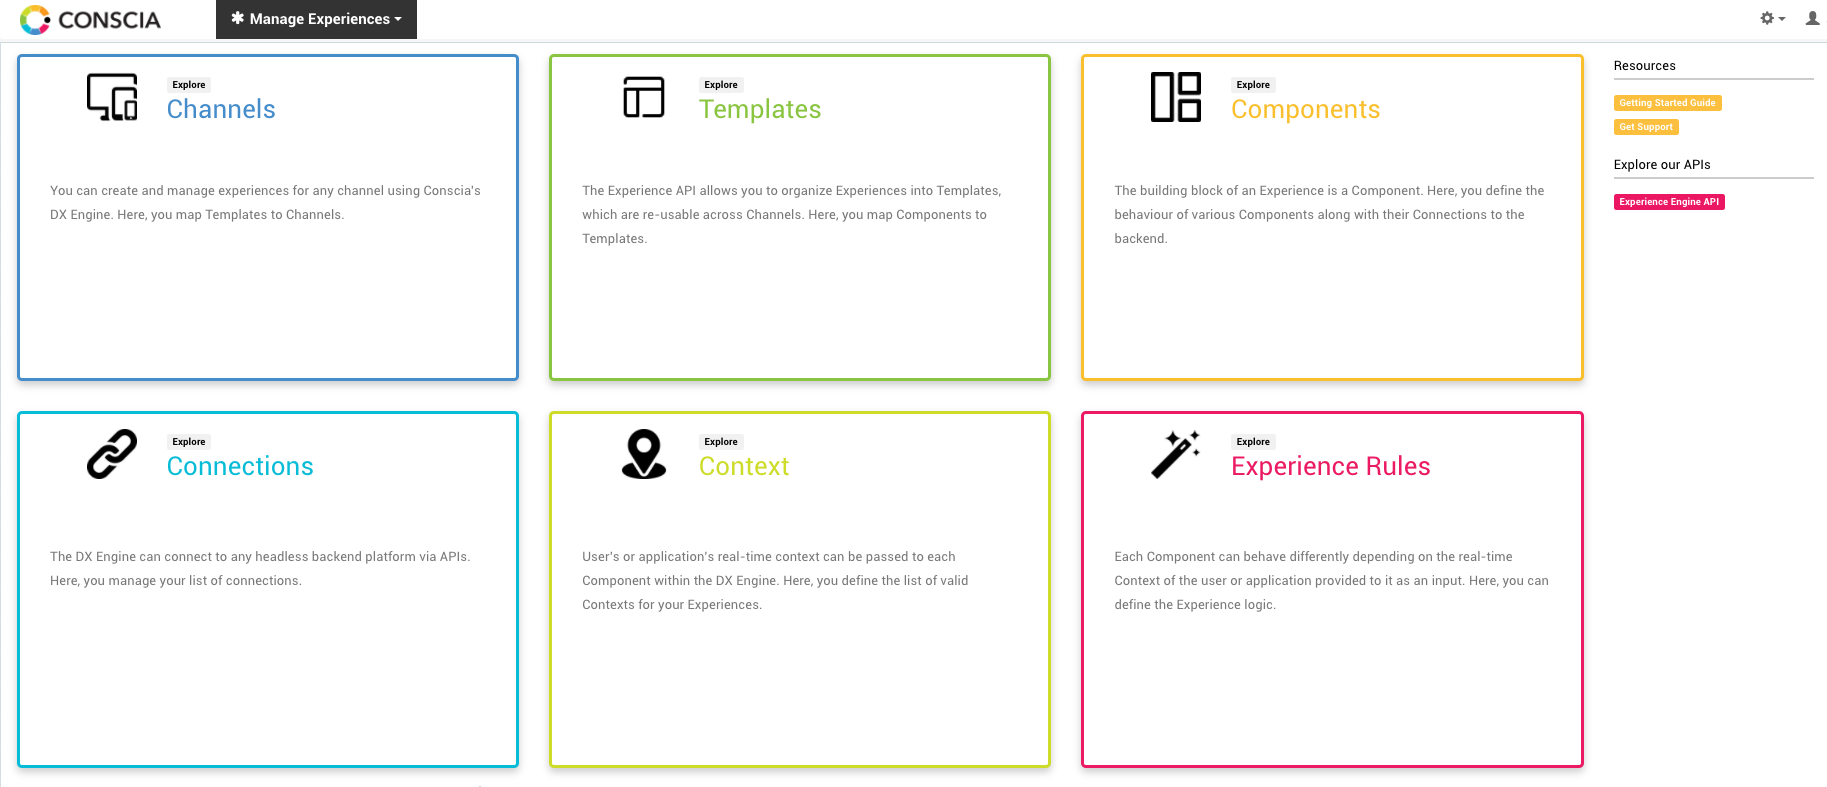
From here, you can navigate to the various Orchestration Components. Let's get started with exploring each DX Component in greater detail.
Orchestration Components
Orchestration Components are the atomic working unit for the DX Engine. Within your sandbox environment, you will be configuring Experience Rules for each DX Component that delivers dynamic content or data to the frontend. You will find that different Orchestration Components give you different options for configuring business logic. For example, static Orchestration Components source a single content record from the system of record whereas dynamic Components source a set of records based on a criteria.
Here's an example of a sandbox environment containing three (3) different starter Orchestration Components.
-
Banner
- Sourced from Contentstack
- DX Component Type:
Contentstack - Static Record List - The Banner Component pulls the list of banners that are hand selected by the business user.
-
Featured Blogs
- Sourced from Contentful
- Component Type:
Contentful - Dynamic Record List - The Featured Blogs Component is sourcing content dynamically from Contentful based on the customerSegment passed in the query to the DX Engine.
-
Featured Product List
- Sourced from BigCommerce
- Component Type:
BigCommerce - Product List - The list of products is dynamically sourced from BigCommerce based on the customer's real-time context.
Let's dive deeper into how a Component is configured. To review the configuration of a Component, for example the banner Component, right click on it and select 'View/Edit Configuration'.
When looking at a DX Component, you'll notice that each has a name, description and type. when looking at the banner Component, you'll notice that the 'Component Type' is 'Contentstack - Static Record List'. This DX Component uses Conscia's sandbox Contentstack instance and is tied to the "Banner" content type in Contentstack. Looking further in the configuration, we can see that the DX Component leverages the "Contentstack for Partners" connection and is binded to the staging environment.
The Reference Front-End
A front-end, created in Builder.io, has been configured to consume the JSON payload coming from the Experience API. This helps showcase the different aspects of the payload from an end-user point of view.
To access the front-end, you will need two (2) pieces of information:
- Your sandbox customer code
- The Template code for the page you'd like to visualize
Once you have those two items, you can navigate to the following URL:
https://aim-ui.conscia.io/<sandbox-customer-code>/<landing-page-code>
This is what the front-end looks like:
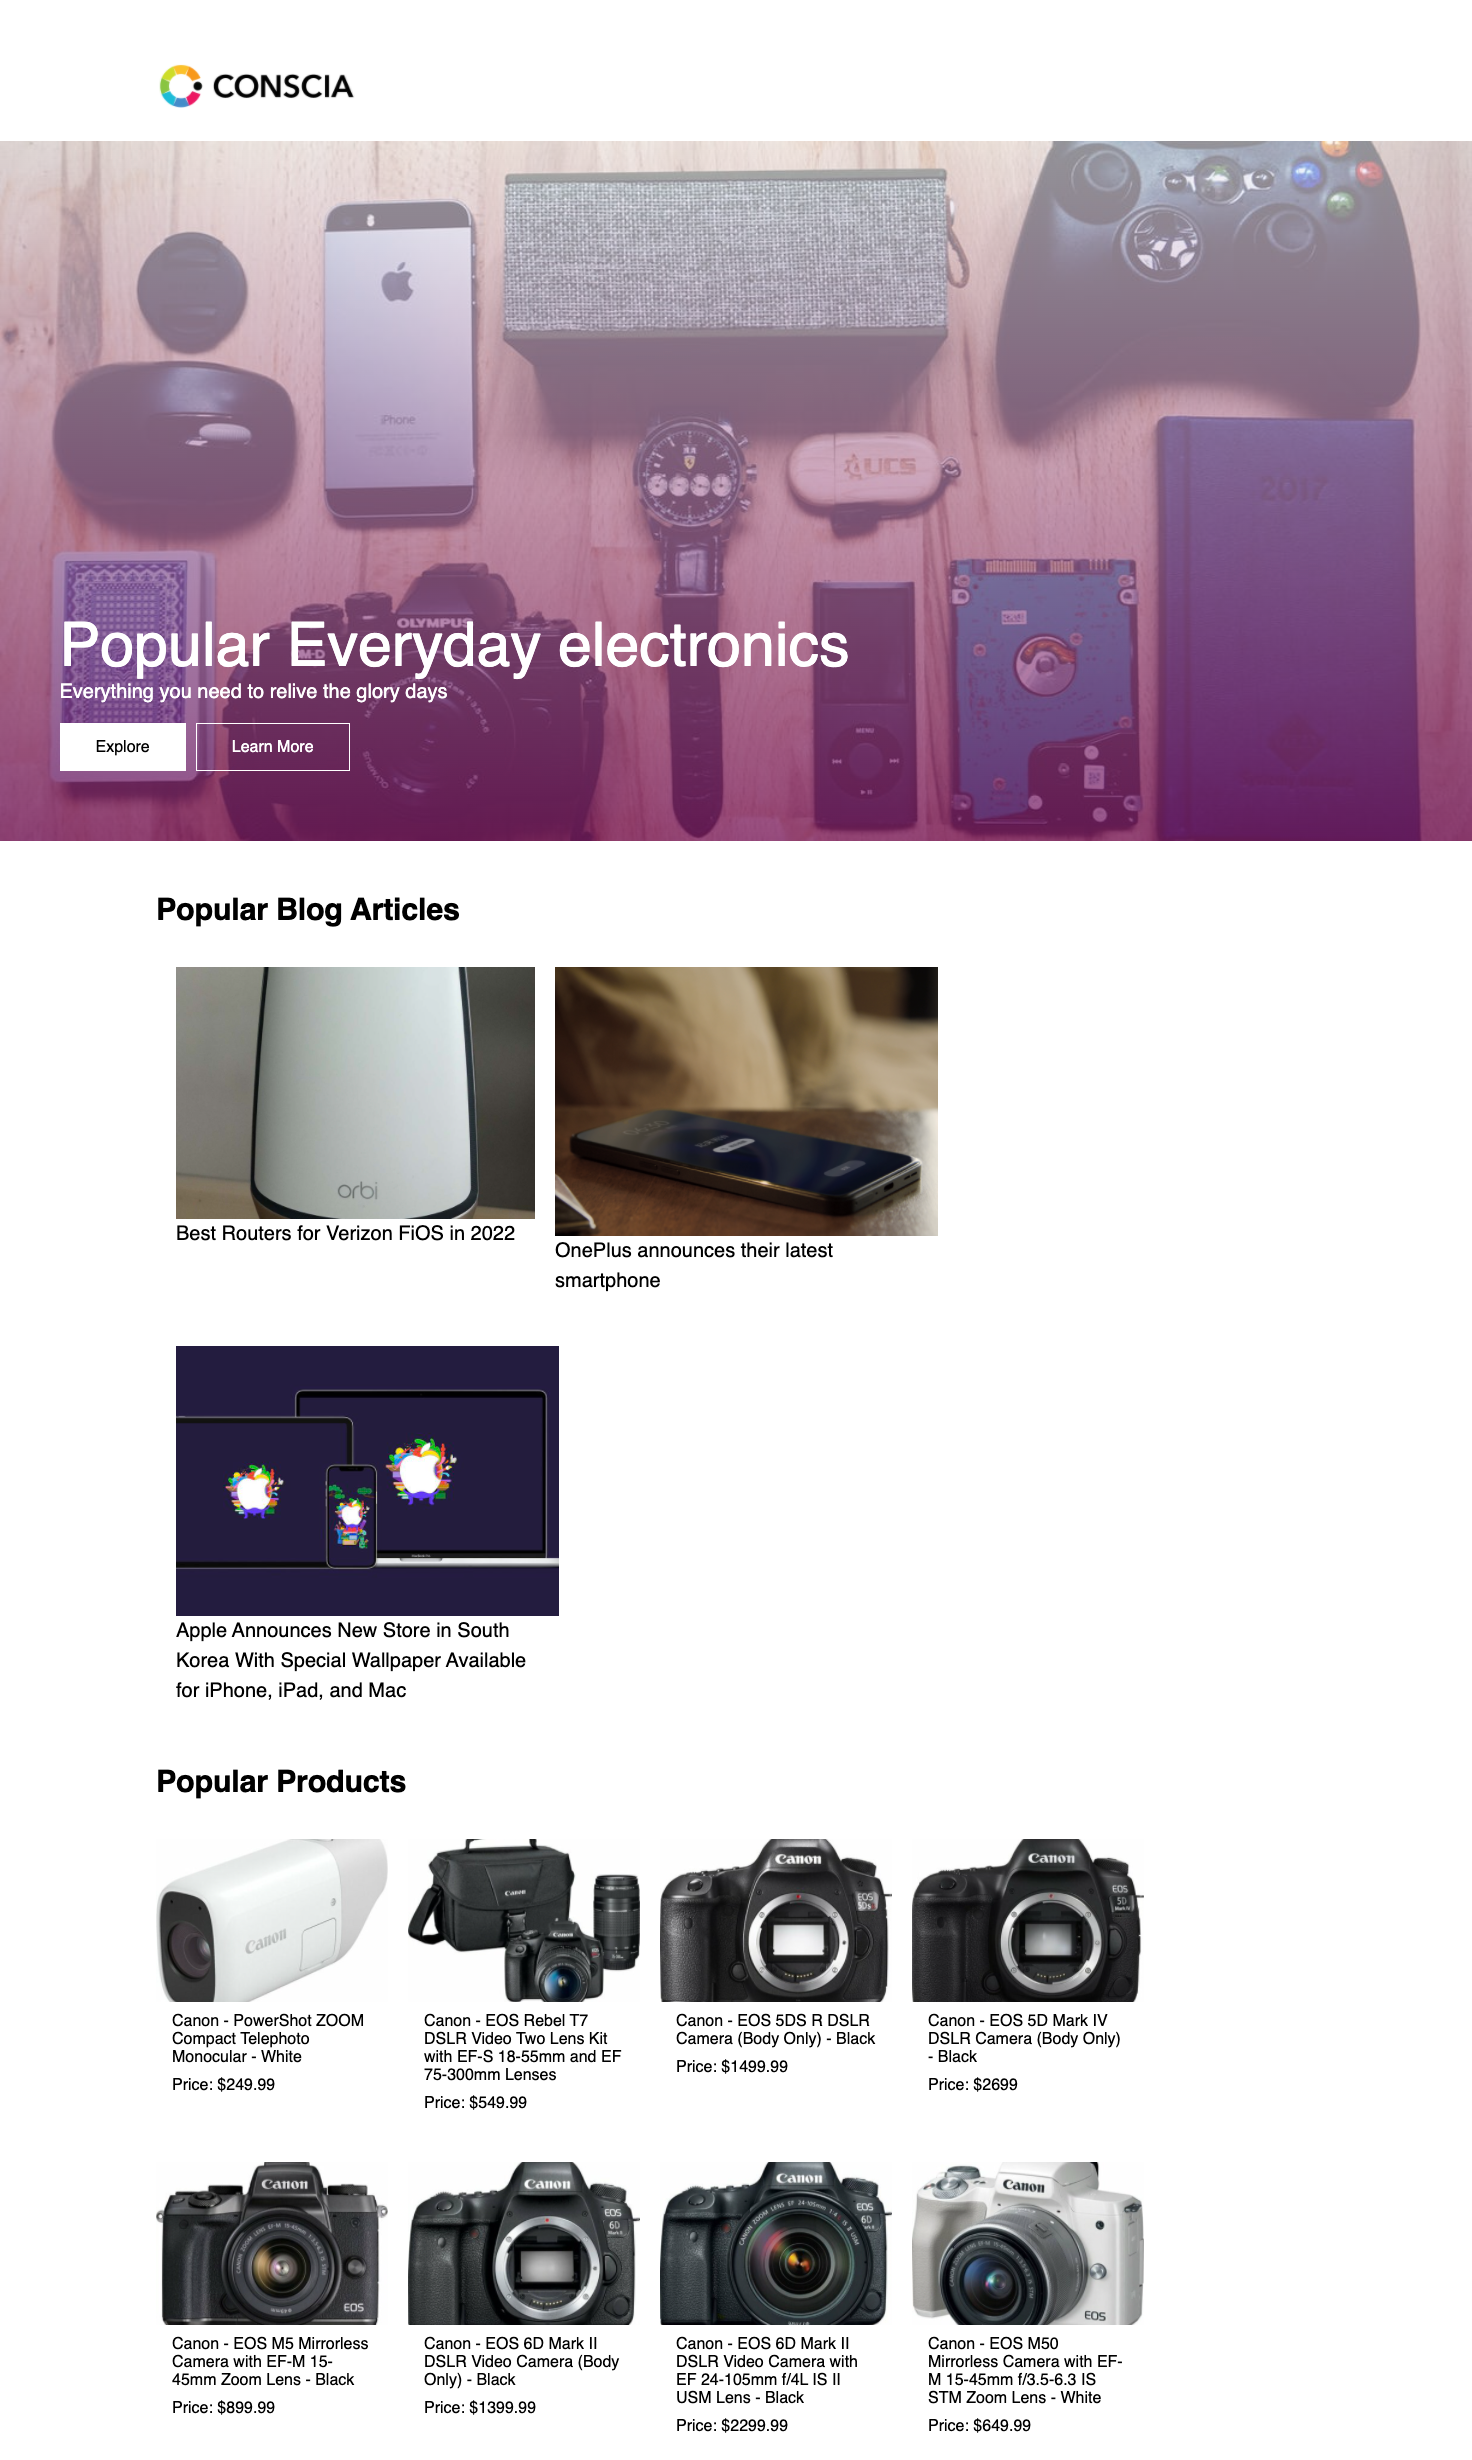
The sample front-end renders the contents contained within the response payload, in this case, the three visual Components, a banner, blogs and products.
Passing A User's Real-time Context via the Front-end
Similiar to passing context to the DX Engine via the API, context can be passed to the front-end by including it as part of the page URL request.
For example, a context field has been defined for customer segment (code: customerSegment). We know one of the values for customer segment is 'traveler'. So, to pass this context in the URL, we can add "?customerSegment=traveler" as the URL suffix.
https://aim-ui.conscia.io/<sandbox-customer-code>/landingPage?customerSegment=traveler
This causes a different experience rule to take effect and returns different content. In the example above, we can see the hero banner changes to reflect the context.
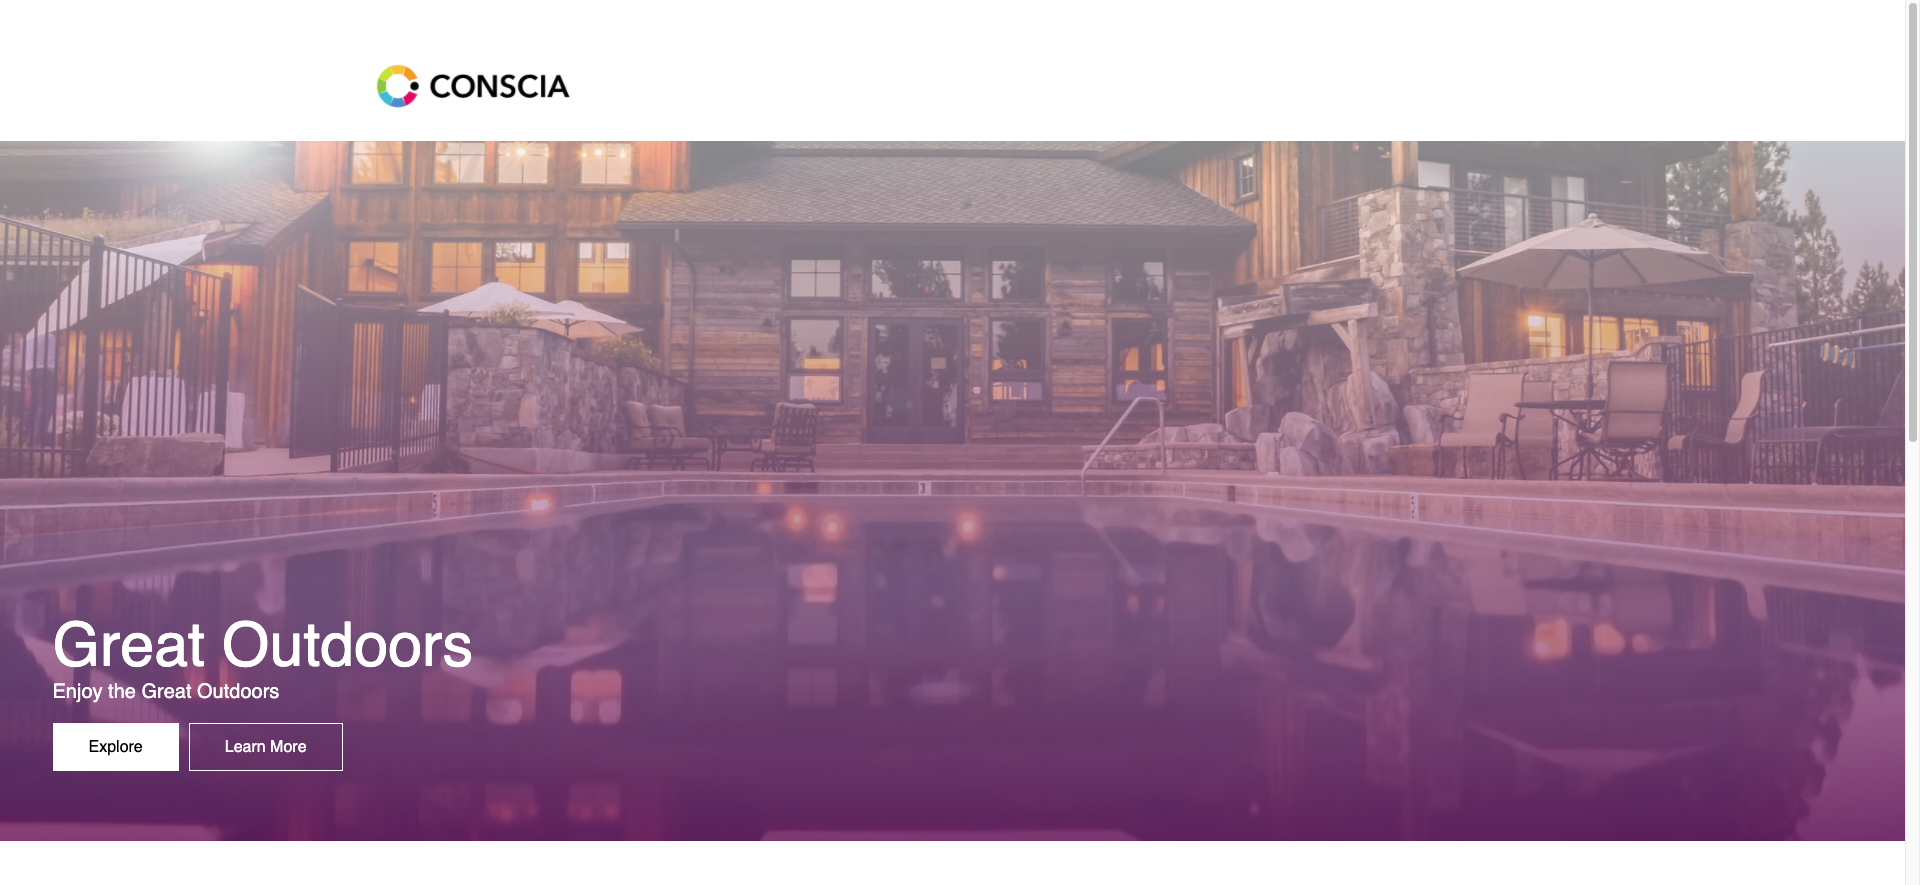
Here's another example:
https://aim-ui.conscia.io/<sandbox-customer-code>/landingPage?customerSegment=home_office
Making Changes to Your Sandbox
Now that you are familiar with all the various dashboards in the DX Engine UI, let's dive in and make some changes to your sandbox.
Create a New Component
Now that you have a good understanding of the elements within the DX Engine UI, you may want to create a DX Component of your own in order to connect to an headless content source.
For this example, we would like to create a new DX Component that dynamically sources Popular Products from BigCommerce based on certain filter and sort parameters. Specifically, we want to return the most popular products in a specific category.
- Navigate to MANAGE EXPERIENCES > EXPERIENCE COMPONENTS.
- In the dashboard, select the “+” button to create a new DX Component.

-
In the form modal, enter the following segment information:
- Component Code (no spaces) : popularproducts
- Component Name (friendly name): Popular Products
- Component Description: Sample Component for popular products
-
In the Components Type field, select “BigCommerce Product List”.
-
In the Options section
- Set the Connection as “BigCommerce for Partners”.
- Select "name" as the Display Fieldname
- Multi-select the desired elements to include in the response.

- Select any "Product Categories" to filter on.
- Select any Brand to include
- Select if the product should be a featured product and whether it should include free shipping products only.
-
Hit submit to save the Component
Setting a Component as an A/B Test Type
When creating a new Component, business users have the option to define the Component as an A/B test type. This is done by checking the “Enable A/B Test” attribute when the Component is created. When this attribute is set, the subsequent experience rules that are part of this Component should be set up so that each experience rule is an A/B variant.

Triggering the A/B Variants
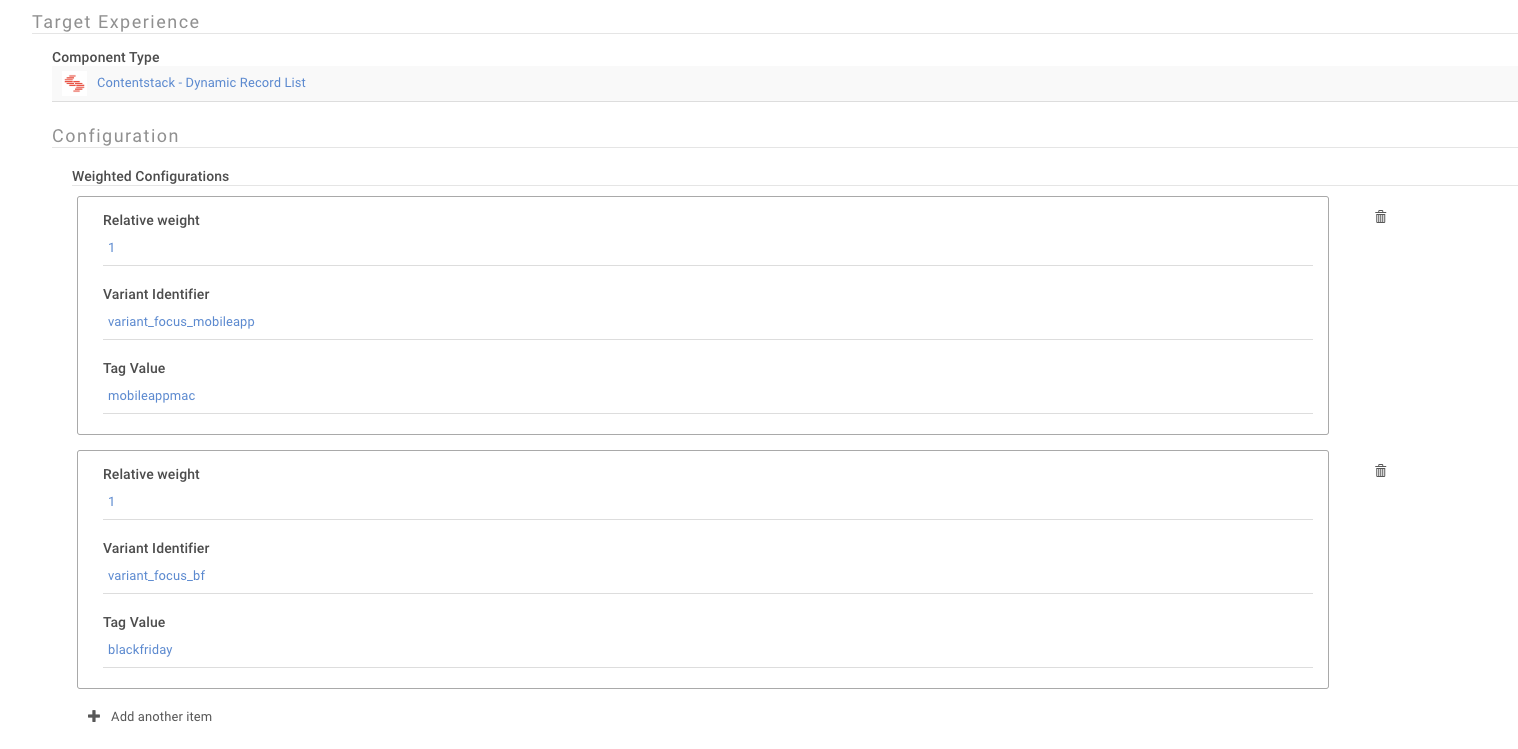
When a rule is define as an A/B test, the target experience will update to allow the business user to define multiple experience variants. Each experience variant carries with it a 'relative weight' that is used by the personalization engine to determine how often the experience variant should be shown. The frequency at which an experience variant appears is based on the variants relative weight divided by the sum of all the relative weights. So, 2 variants with weight of 1 each, would show 50% of the time (1 / 2 = 50%). All of the experience variants defined as part of the rule will be triggered when the trigger condition in the previous section is met.
In the example shown here, two (2) experience variants have been setup and will each showcase 50% of the time. The first variant will dynamically return all Contentstack entries with tag = mobileappmac, whereas the second variant will dynamically return all Contentstack entries with tag = blackfriday. Notice that each variant also has an "identifier". This is a unique value that is passed to the reporting engine to bucket reporting metrics to the appropriate variant.
Adding the DX Component to an Existing DX Template
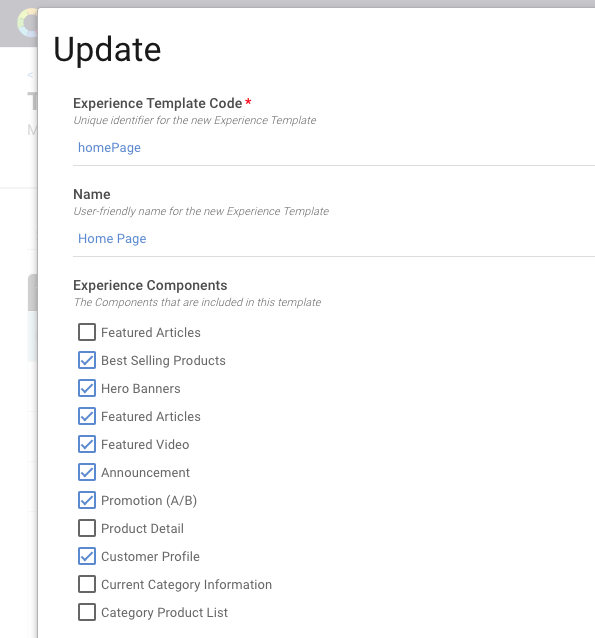
Now that we've created our new DX Component, the next step is to add it to a Template. To do so, navigate to MANAGE EXPERIENCES > TEMPLATES dashboard.
- Select the DX Template you'd like to add the DX Component to. In this case, we'll select the homePage Template.
- Right click the record and select 'Update Template'
- Under the Experience Component Codes, check all experience Components that you would like to add to this Template.
- Hit Submit
Create a New Template
For our next exercise, let's go ahead and create a new Template that represents the product page and add our newly created “Popular Products” Component to the Template.
To create a new Template:
- Navigate to the MANAGE EXPERIENCES > TEMPLATES dashboard
- On the action ribbon, select the “Configure Experience Template” button ("+")
- Enter the following information:
- For the Experience Template Code, enter “productPage” (no spaces). This is the unique identifier for the template
- For the Name, enter “Product Page”. This is the friendly name for the template
- Under Experience Component Codes, add the “popular products” Component that we created earlier.
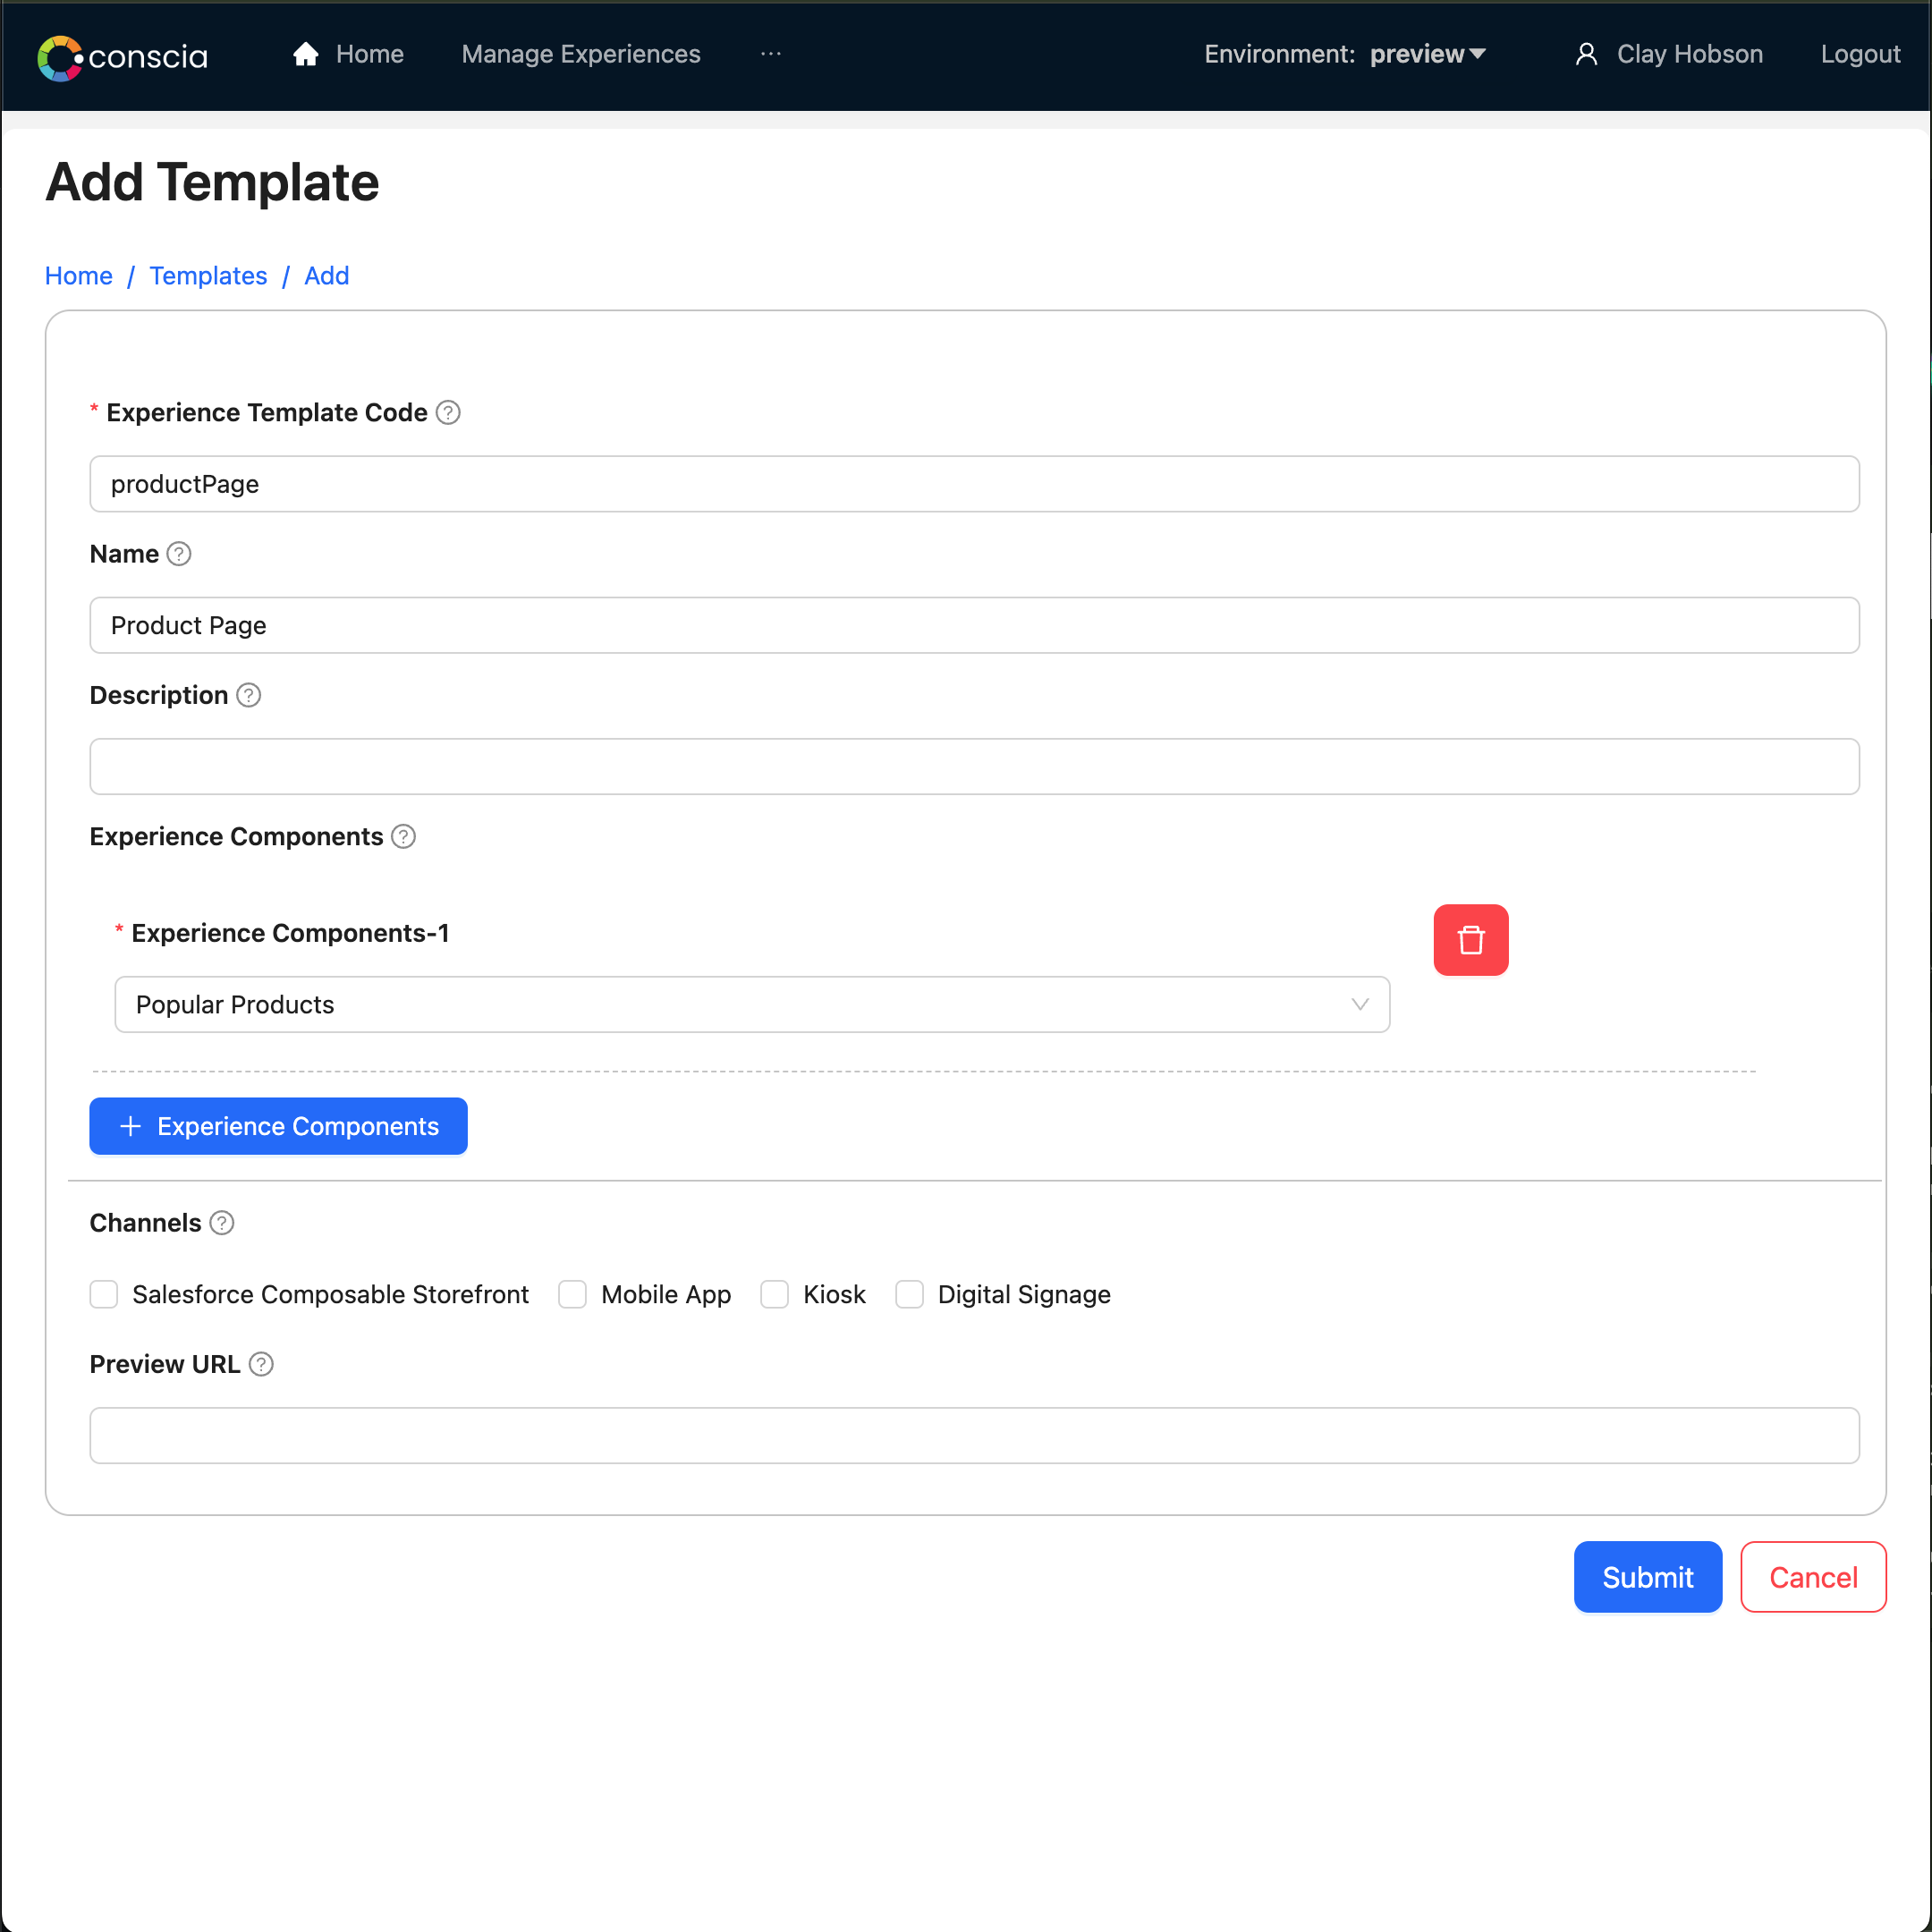
- Hit SUBMIT to save the Template.
We’ve successfully created our product page Template and added our Component to it. The Template can be edited at any time to add (or remove) other Components as needed.
Previewing a Template
When a Template is created AND the contents of the orchestrated / personalized experience are rendered in a front-end outside out the DX Engine UI, Conscia has the ability to incorporate the rendered front-end as a preview directly inside the DX Engine UI. This allows business users to easily preview the front-end experience directly inside the DX Engine UI without the need to navigate away.
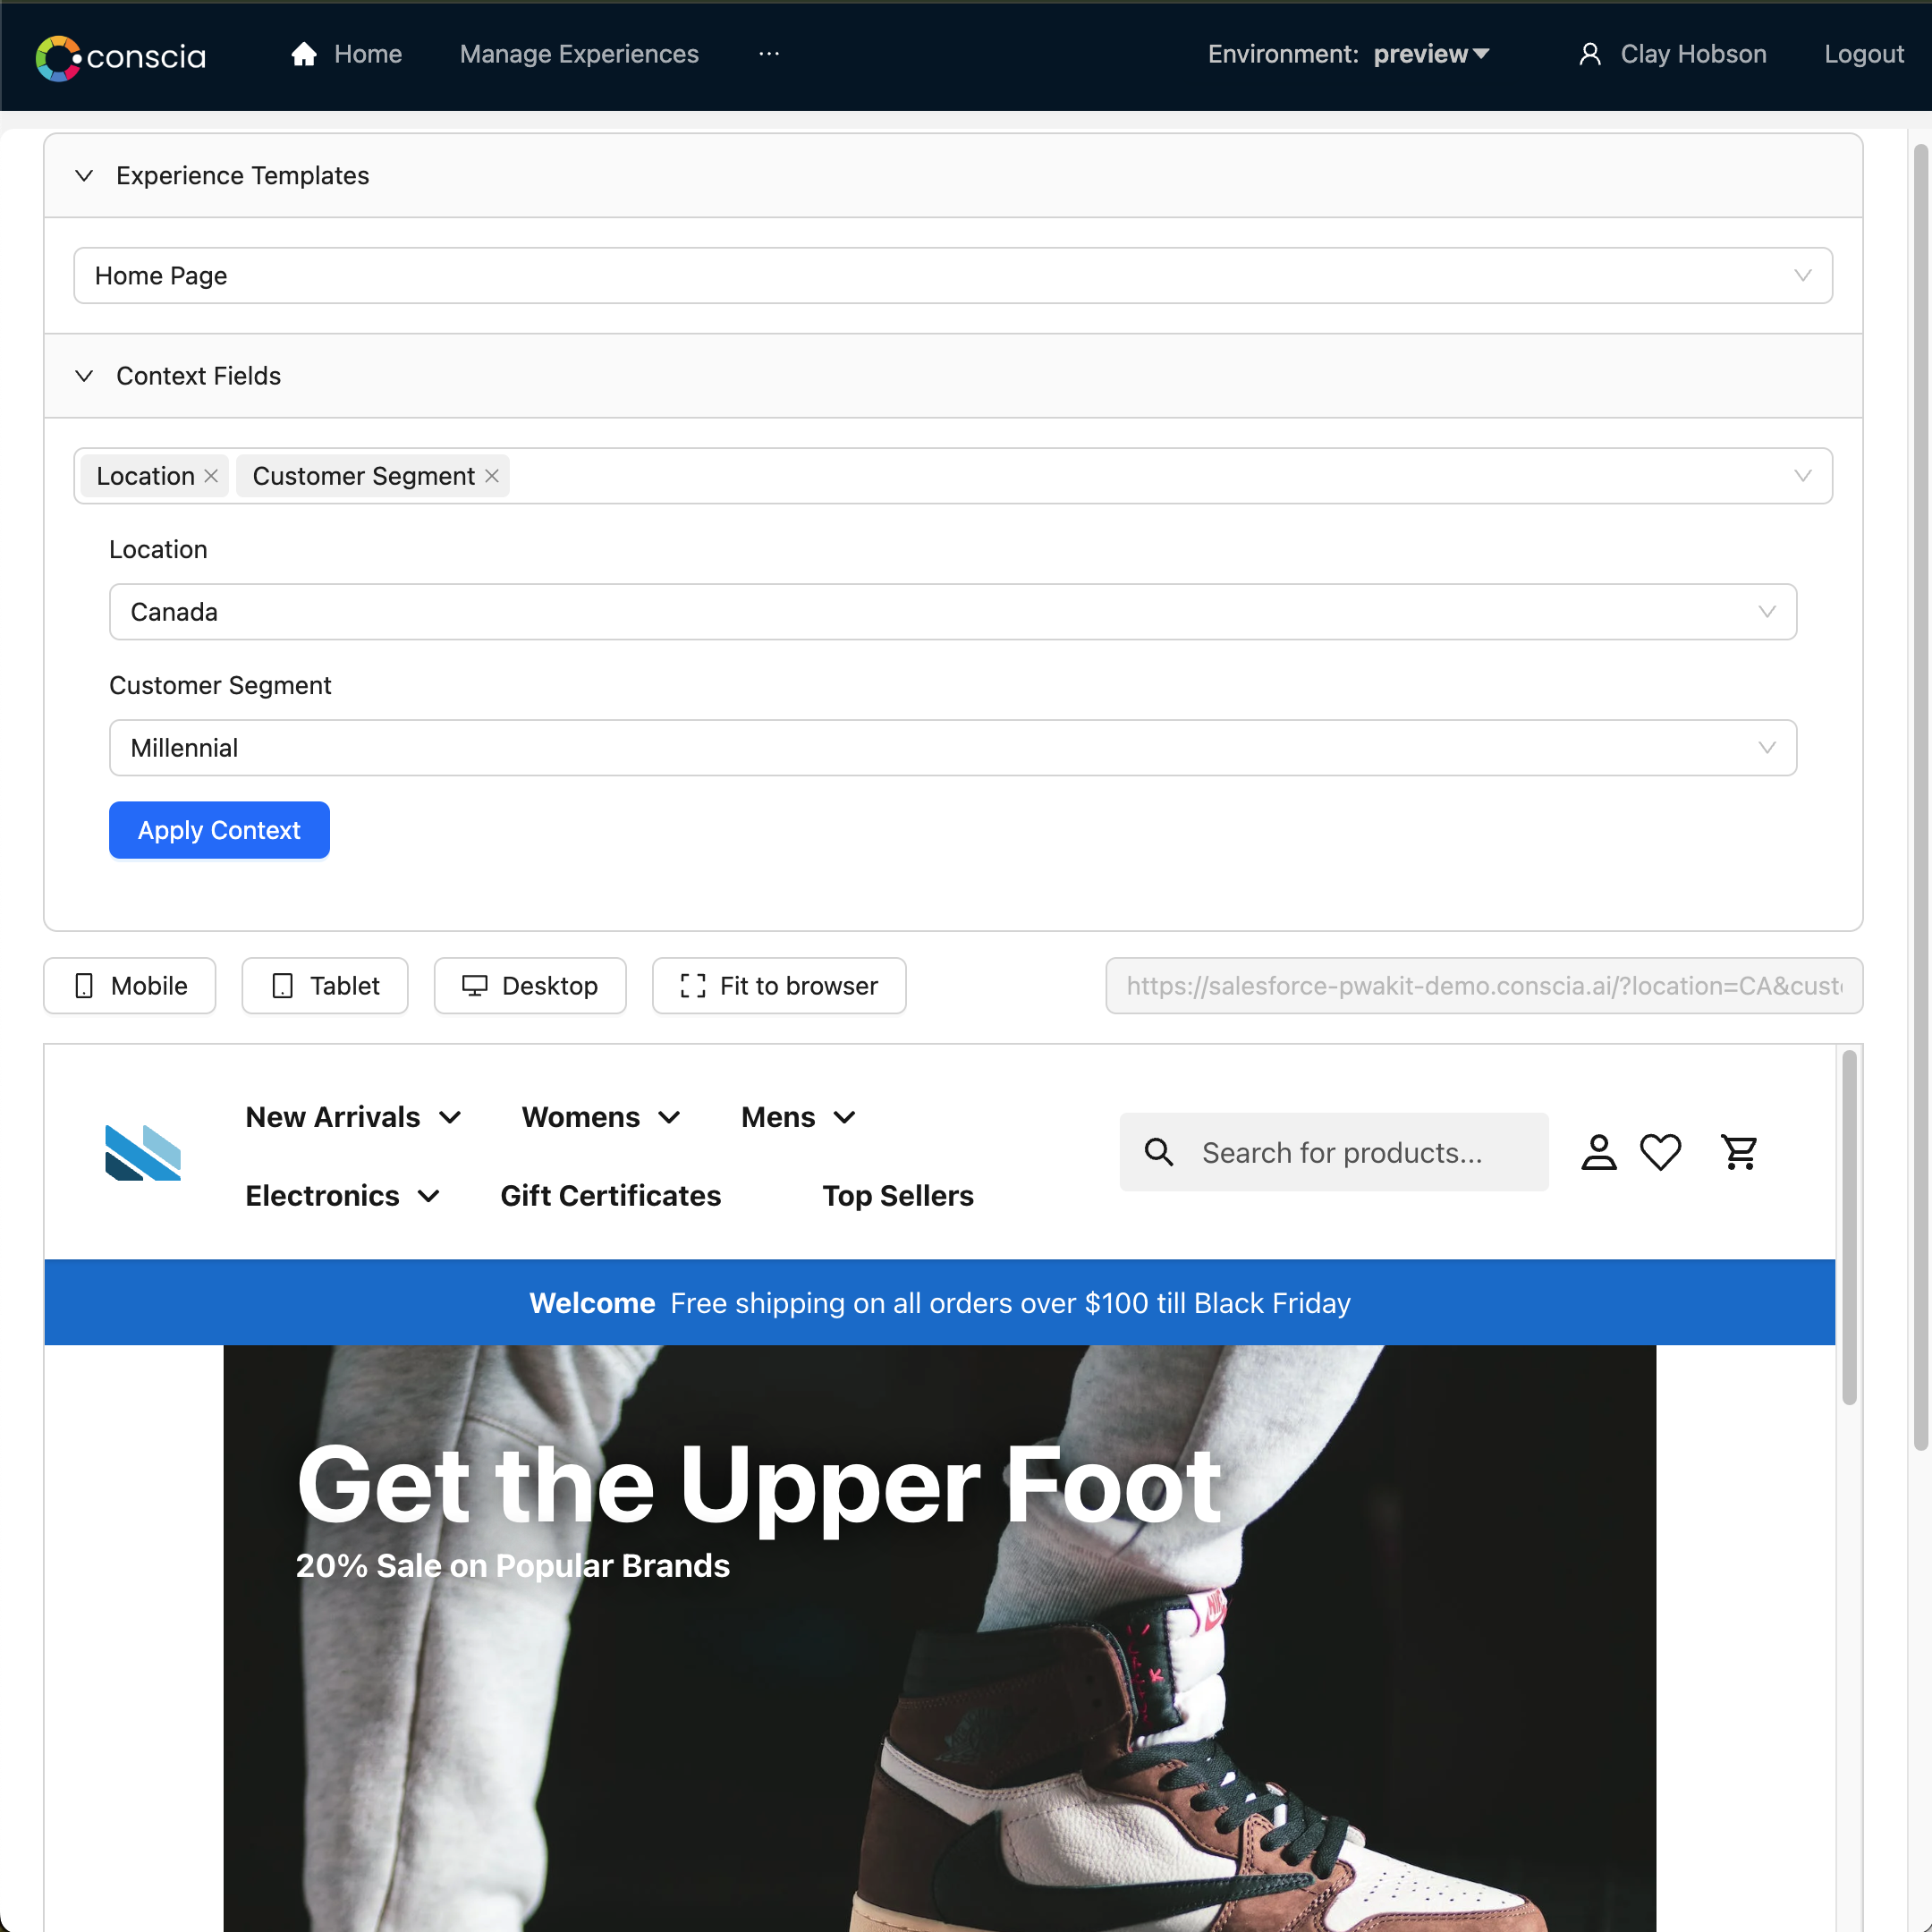
Previewing a Personalized Version of the Template
In addition to the ability to preview a rendered front-end, business users can also configure the calling parameters used for the preview. This allows different experiences personalized to the viewers context to be triggered and returned in the preview. To do this, users can simply expand the “Context” section of the preview modal and select a context and context value from the list of those available
Selecting a context (or combination of context) will cause the rendered preview to change based on the respective experience rules that match the triggering context.

In the example above, you can see that the “Customer Segment”, “Location” and “Device” are all available contexts that are made available. Selecting “United States” causes the rendered preview update based on experience rules that fire when “location = US”.
In the next step, we’ll associate this Template with a channel.
Add a New Channel
As mentioned before, Templates belong to one or more Channel. Channels are a way of grouping Templates for organizational purposes. In the example of a product page above, the Template might be shared by a ‘Web’ and ‘Mobile’ Channel.
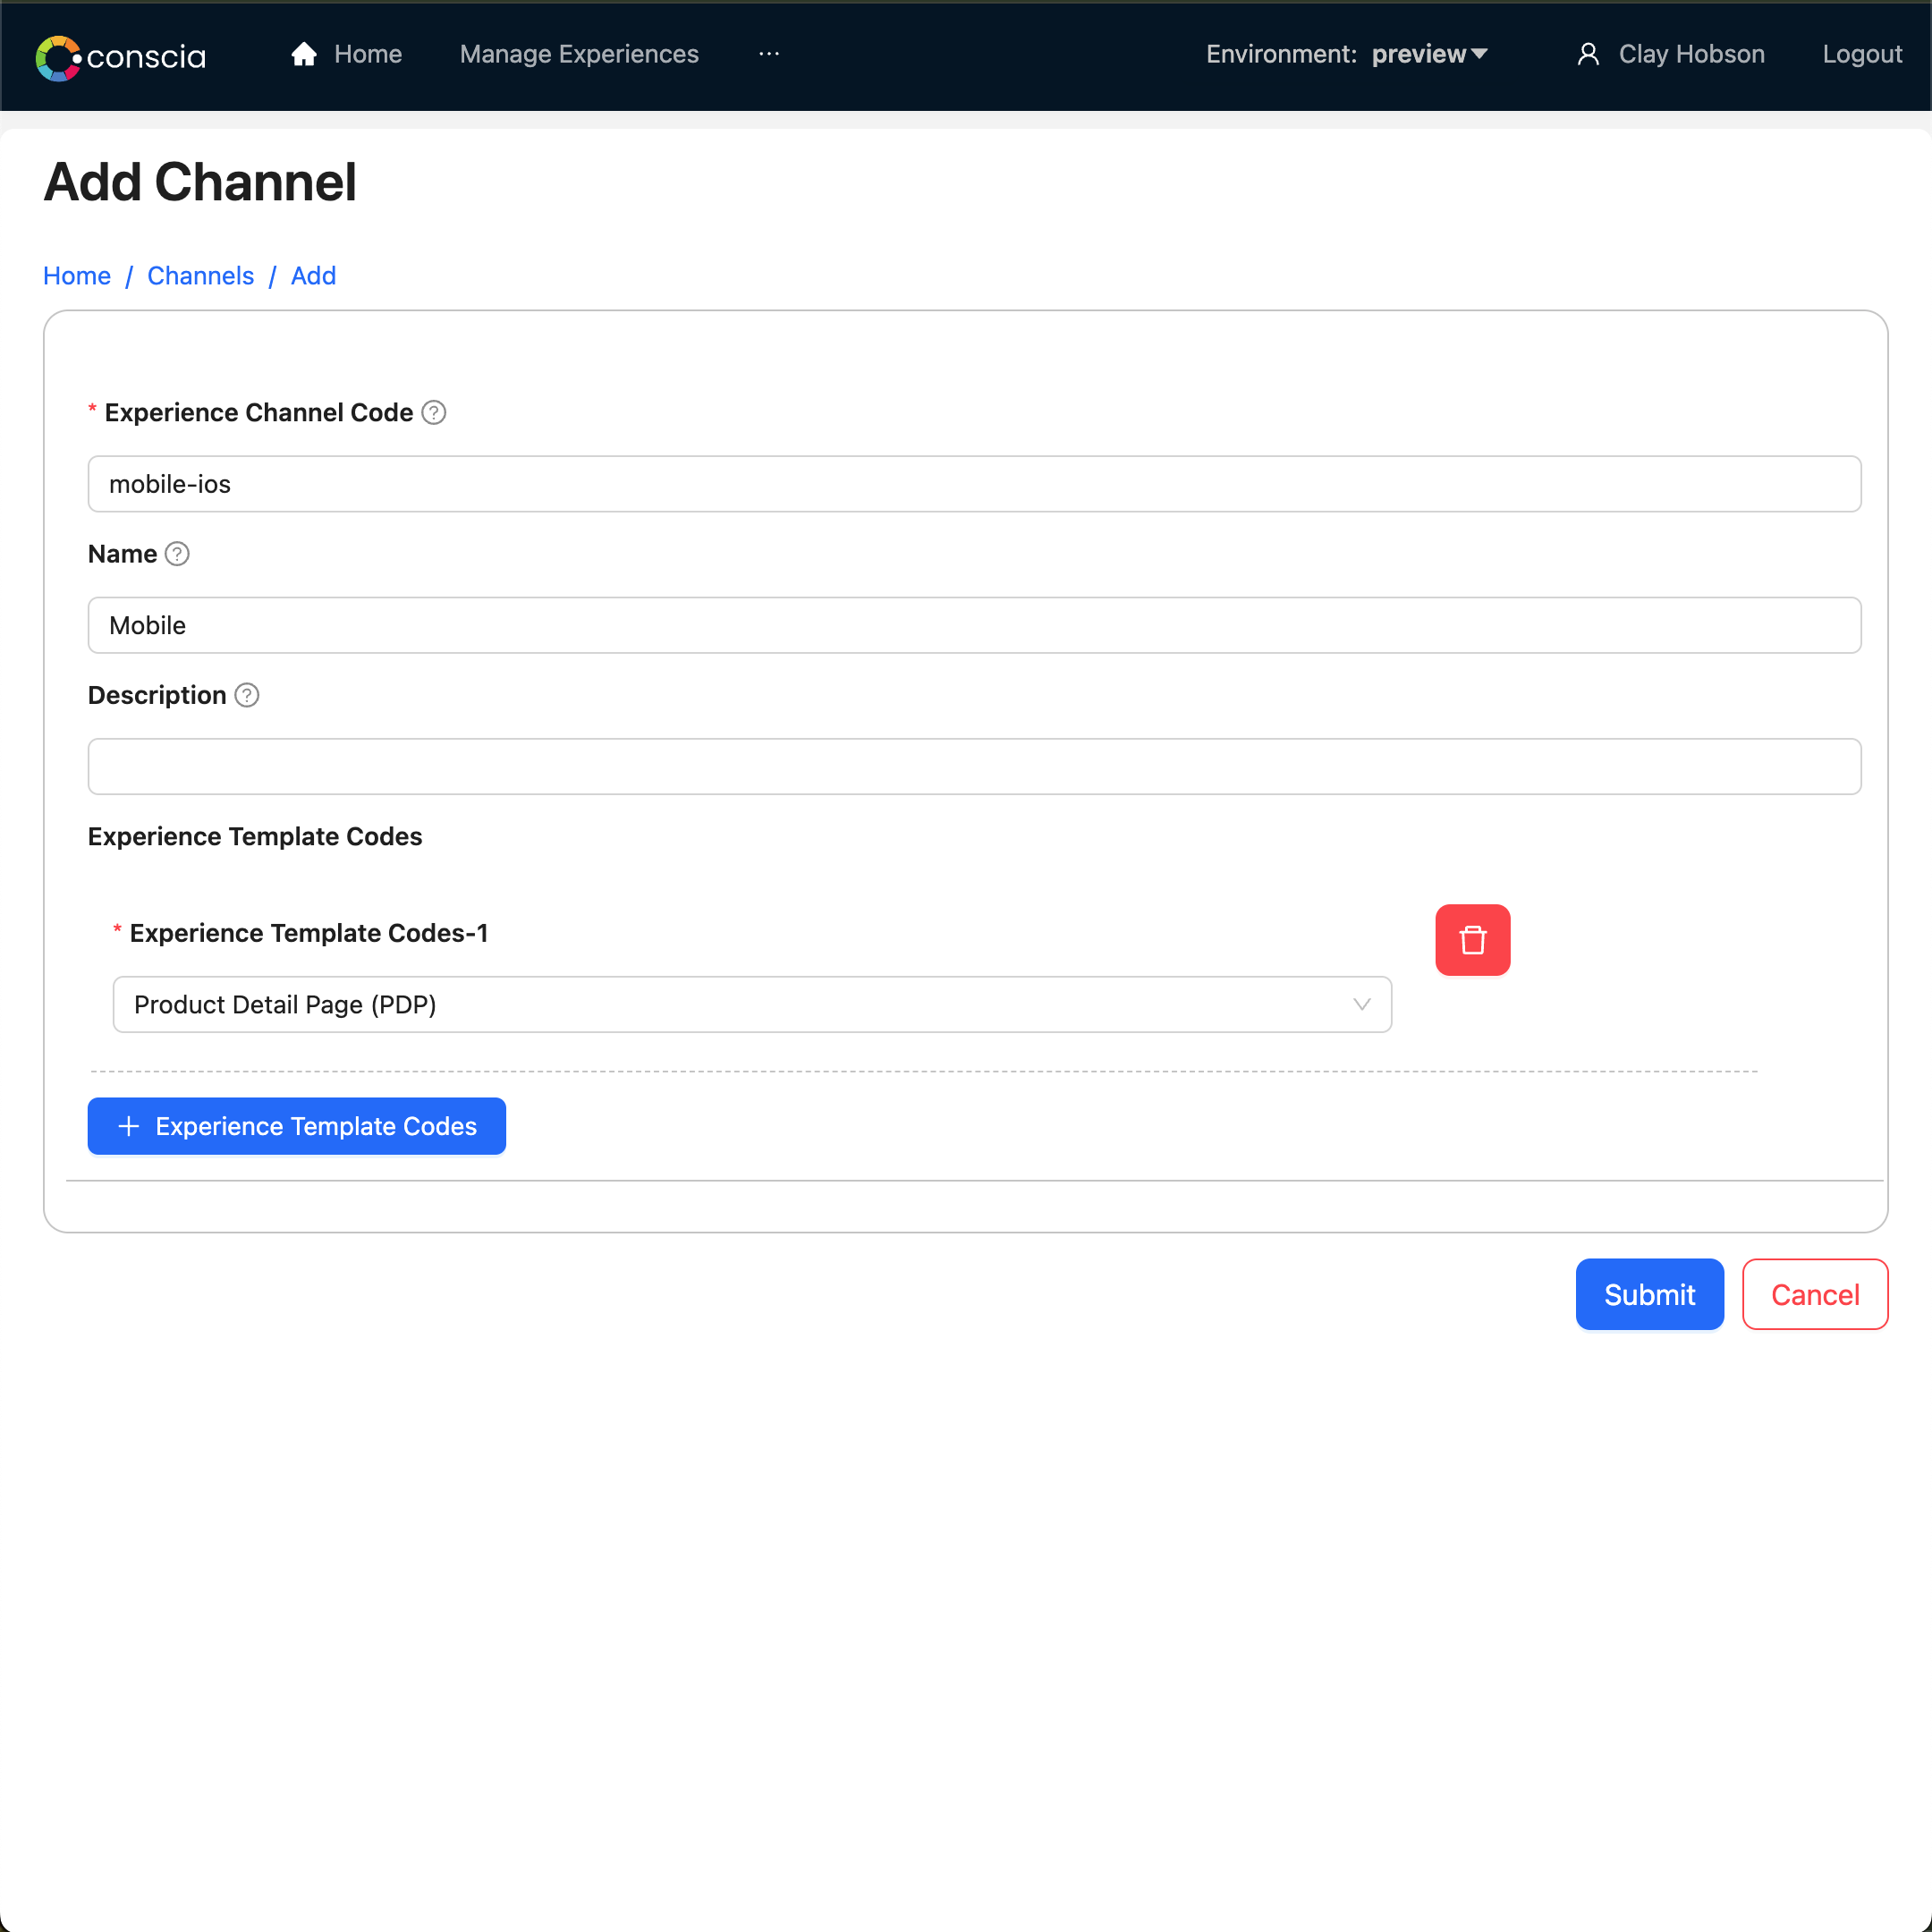
Channels are created similar to Templates and can contain a number of Templates:
- Navigate to the MANAGE EXPERIENCES > CHANNELS dashboard
- On the action ribbon, select the “Create Record” button
- Enter the following information:
- For the Experience Channel Code, enter “mobile-ios”. This is the unique identifier for the channel (no spaces)
- For the Name, enter “Mobile”. This is the friendly name for the channel
- For the Experience Template, search and add “productPage” to the list.
- Hit Submit to save the channel.
Now that we’ve set up our Channel, Template and Components, we’ll do one final step by adding a context field to the Components.
Add a New Context Field
The ability to present different content to different audiences while on the same page is done through the use of context fields. Context fields are pre-defined “triggers” and Component rules can be configured to present different content based on the incoming trigger conditions (context fields).
Example of Context Fields
For this example, we'll set up a new context field for "location". This will allow us to show different featured articles based on what location the customer is in.
To Create a New Context Field:
- Navigate to the “MANAGE EXPERIENCES > CONTEXT FIELDS” dashboard
- Select the "+" button in the action ribbon to create a new record
- Enter the name of the context field (i.e. location) [no spaces]
- Enter "Geographical Location" as the Display Name
- Select "String" as the Data Type
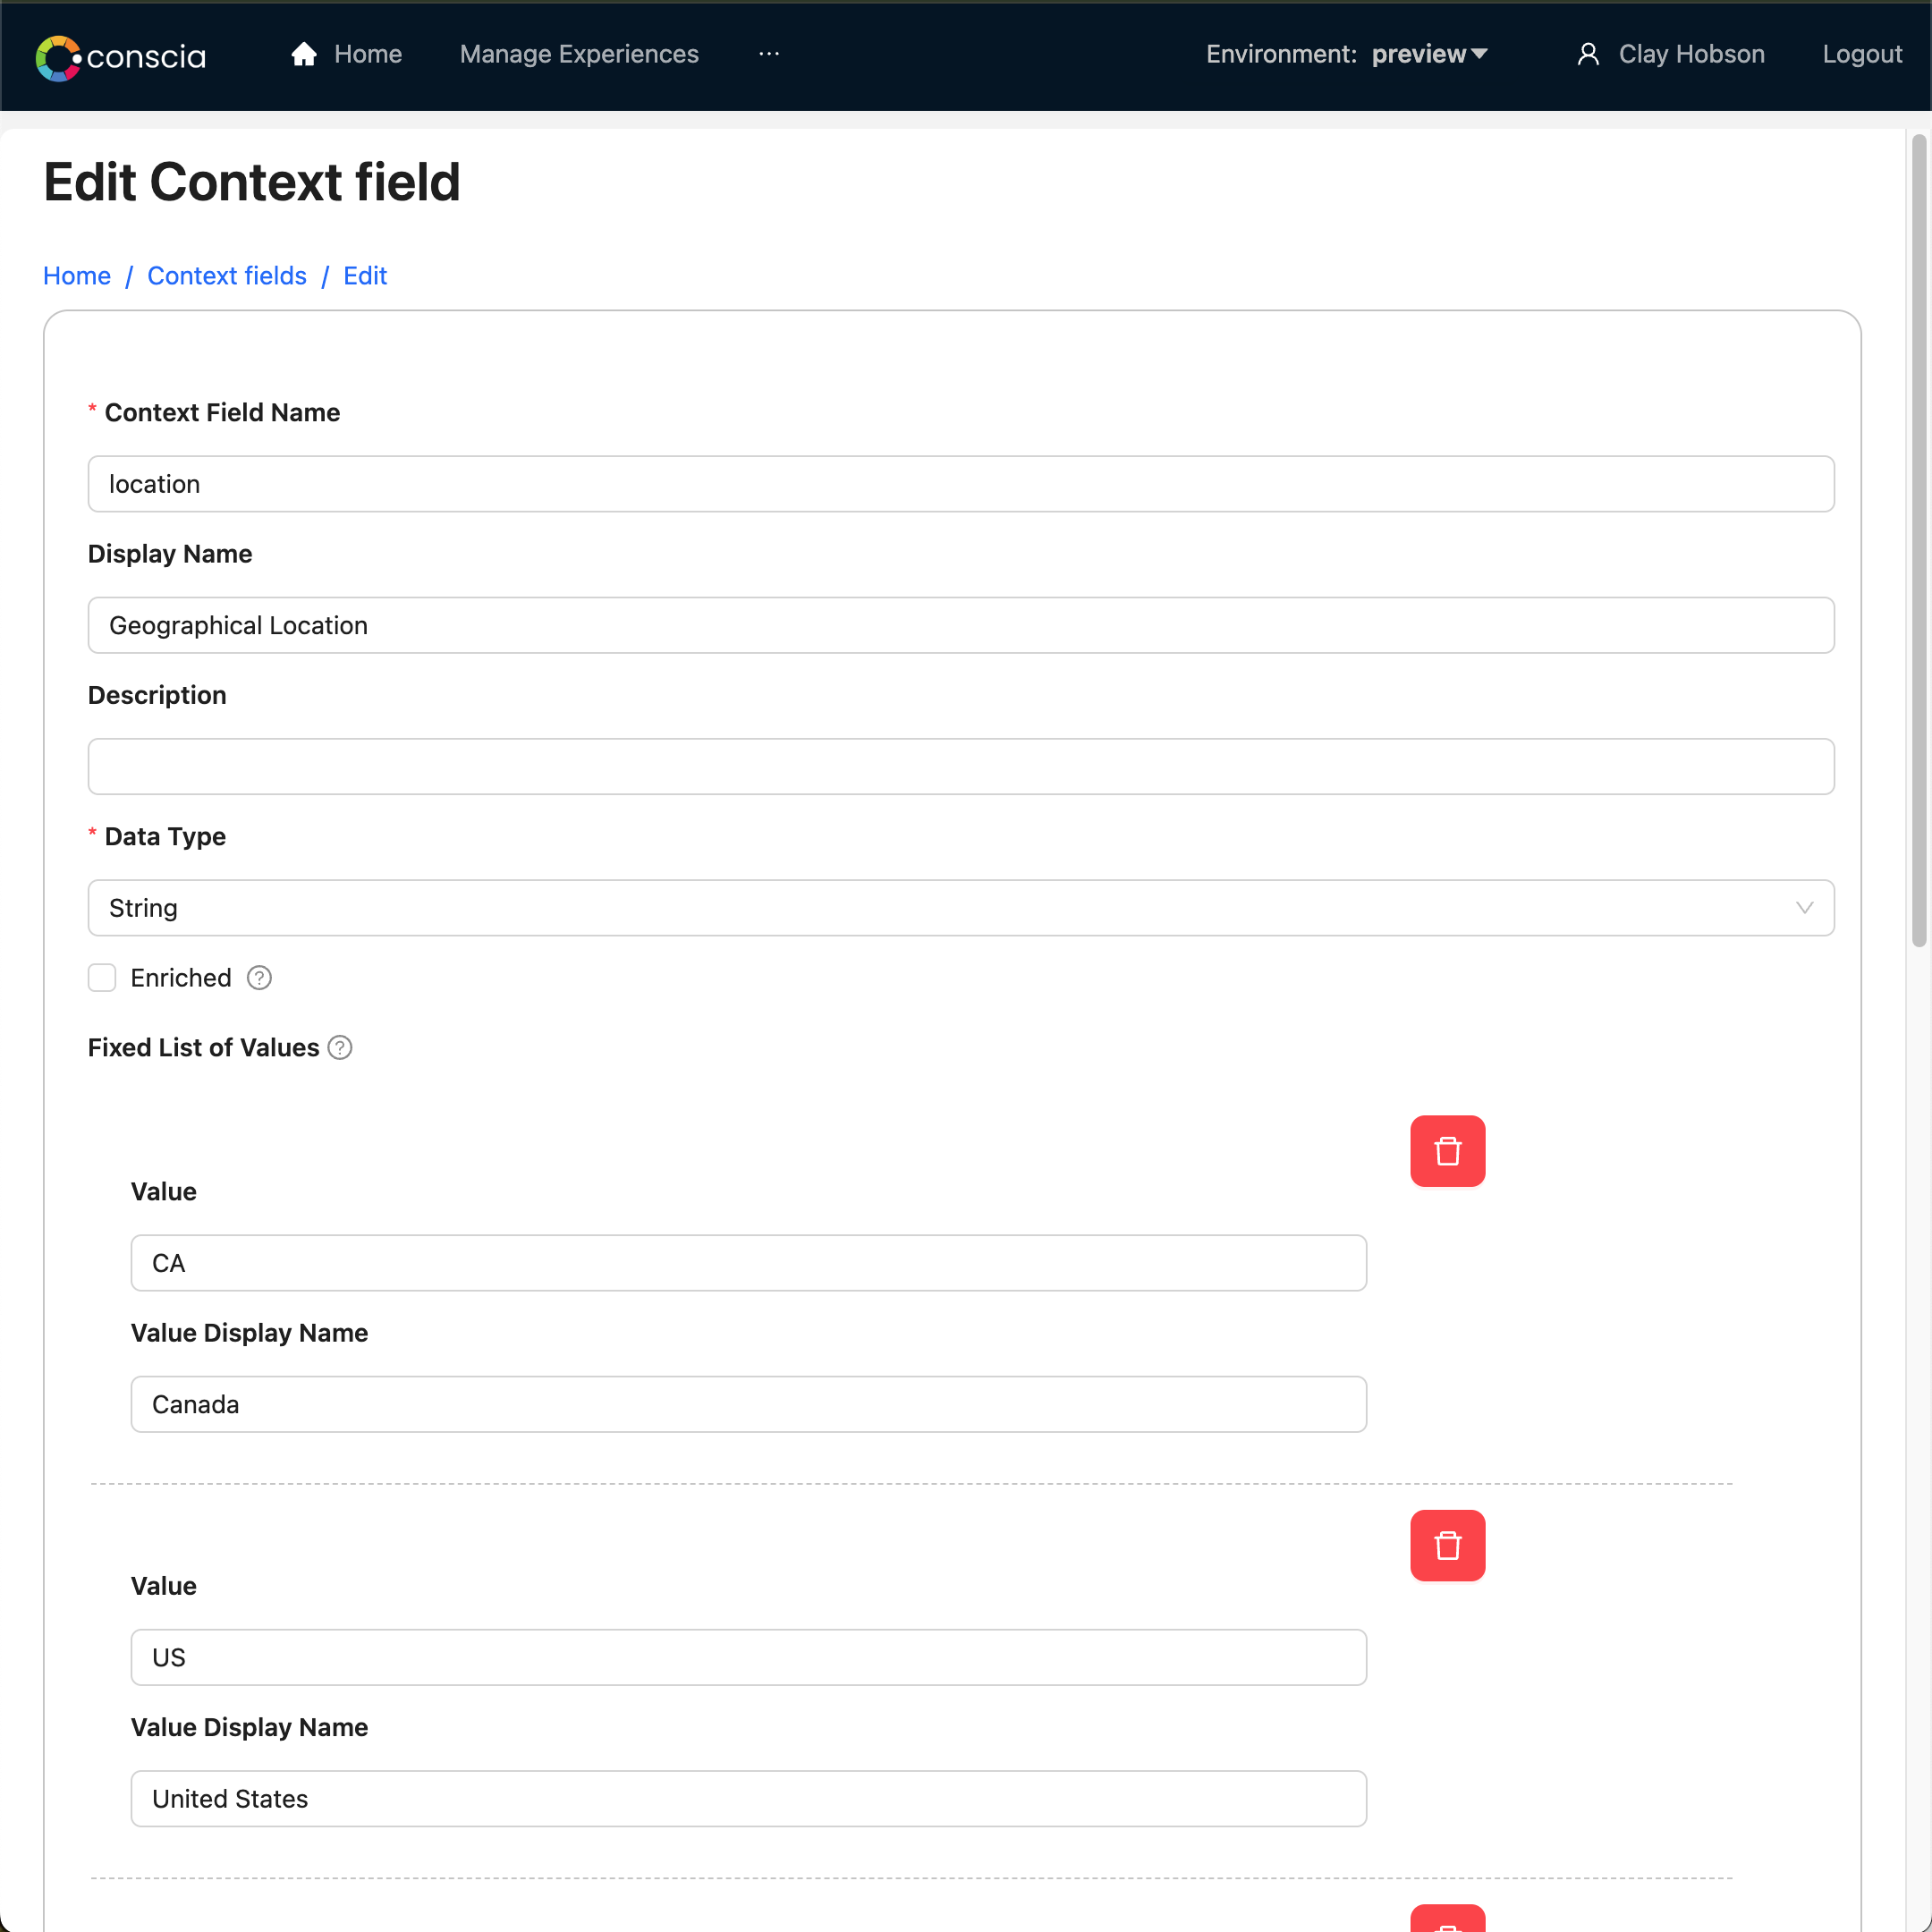
- Enter Canada and USA as values in the Fixed List of Values
- Leave the other values empty and hit Submit
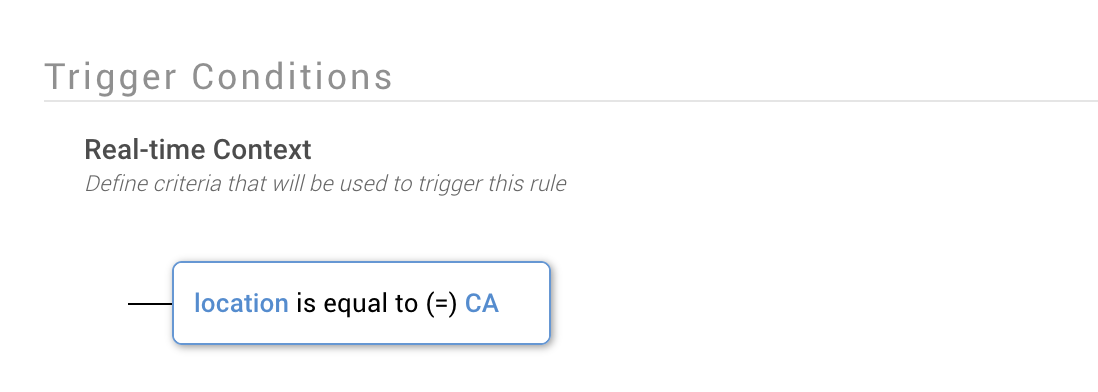
When context fields are created, they are automatically made available as part of the trigger conditions within an experience rule.
Providing advanced rendering instructions to the front-end
Sometimes you want to instruct the front-end to include certain styling or layout details for different customer contexts. For instance, customers coming from Canada should see a different theme than if they are coming from US.
Here is how you would set this up:
- On the Components dashboard, add a new Component.
- Select the 'Conscia - Rendering Instructions' Component from the list of Component types.
- Fill in the necessary details
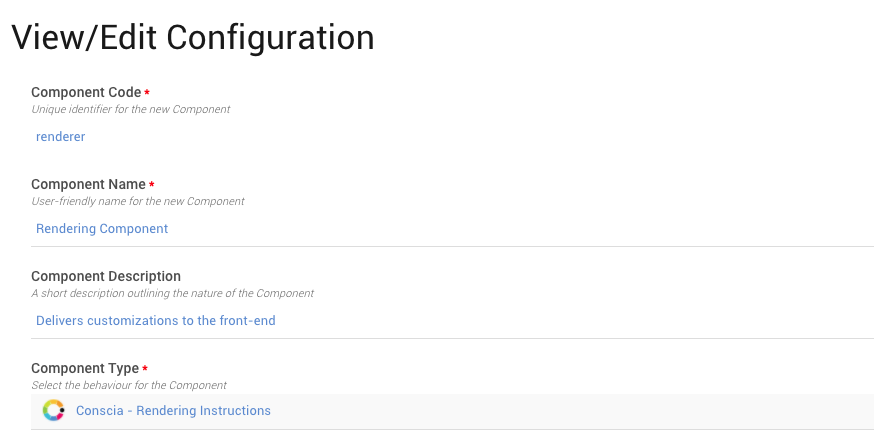
- Hit submit to save the Component
- Navigate to the Template page and add the Component to the target Template
- Navigate to the experience rules page and select the Component
- Create a new rule and incorporate the context (location=Canada) and the following experience:

As seen above, within the 'Target Experience' portion of any rule, generic metadata can be passed to the front-end via a key/value pattern. In the example above, a value of "activeTheme = red_and_white" is passed to the front-end when the containing rule is triggered.